Stairs
January 12, 2023
Over the last few weeks I’ve been working to get the staircase in. I first needed to deal with the unfinished loft edge. I started by placing a trim board over the end.
I then filled the screw holes and directed my attention at the drywall that abutts it.
I plastered in a special type of drywall corner-bead to make a clean and durable edge that sits flush with the trim. I also added a piece of trim atop the curved transition between the lower and upper floors.
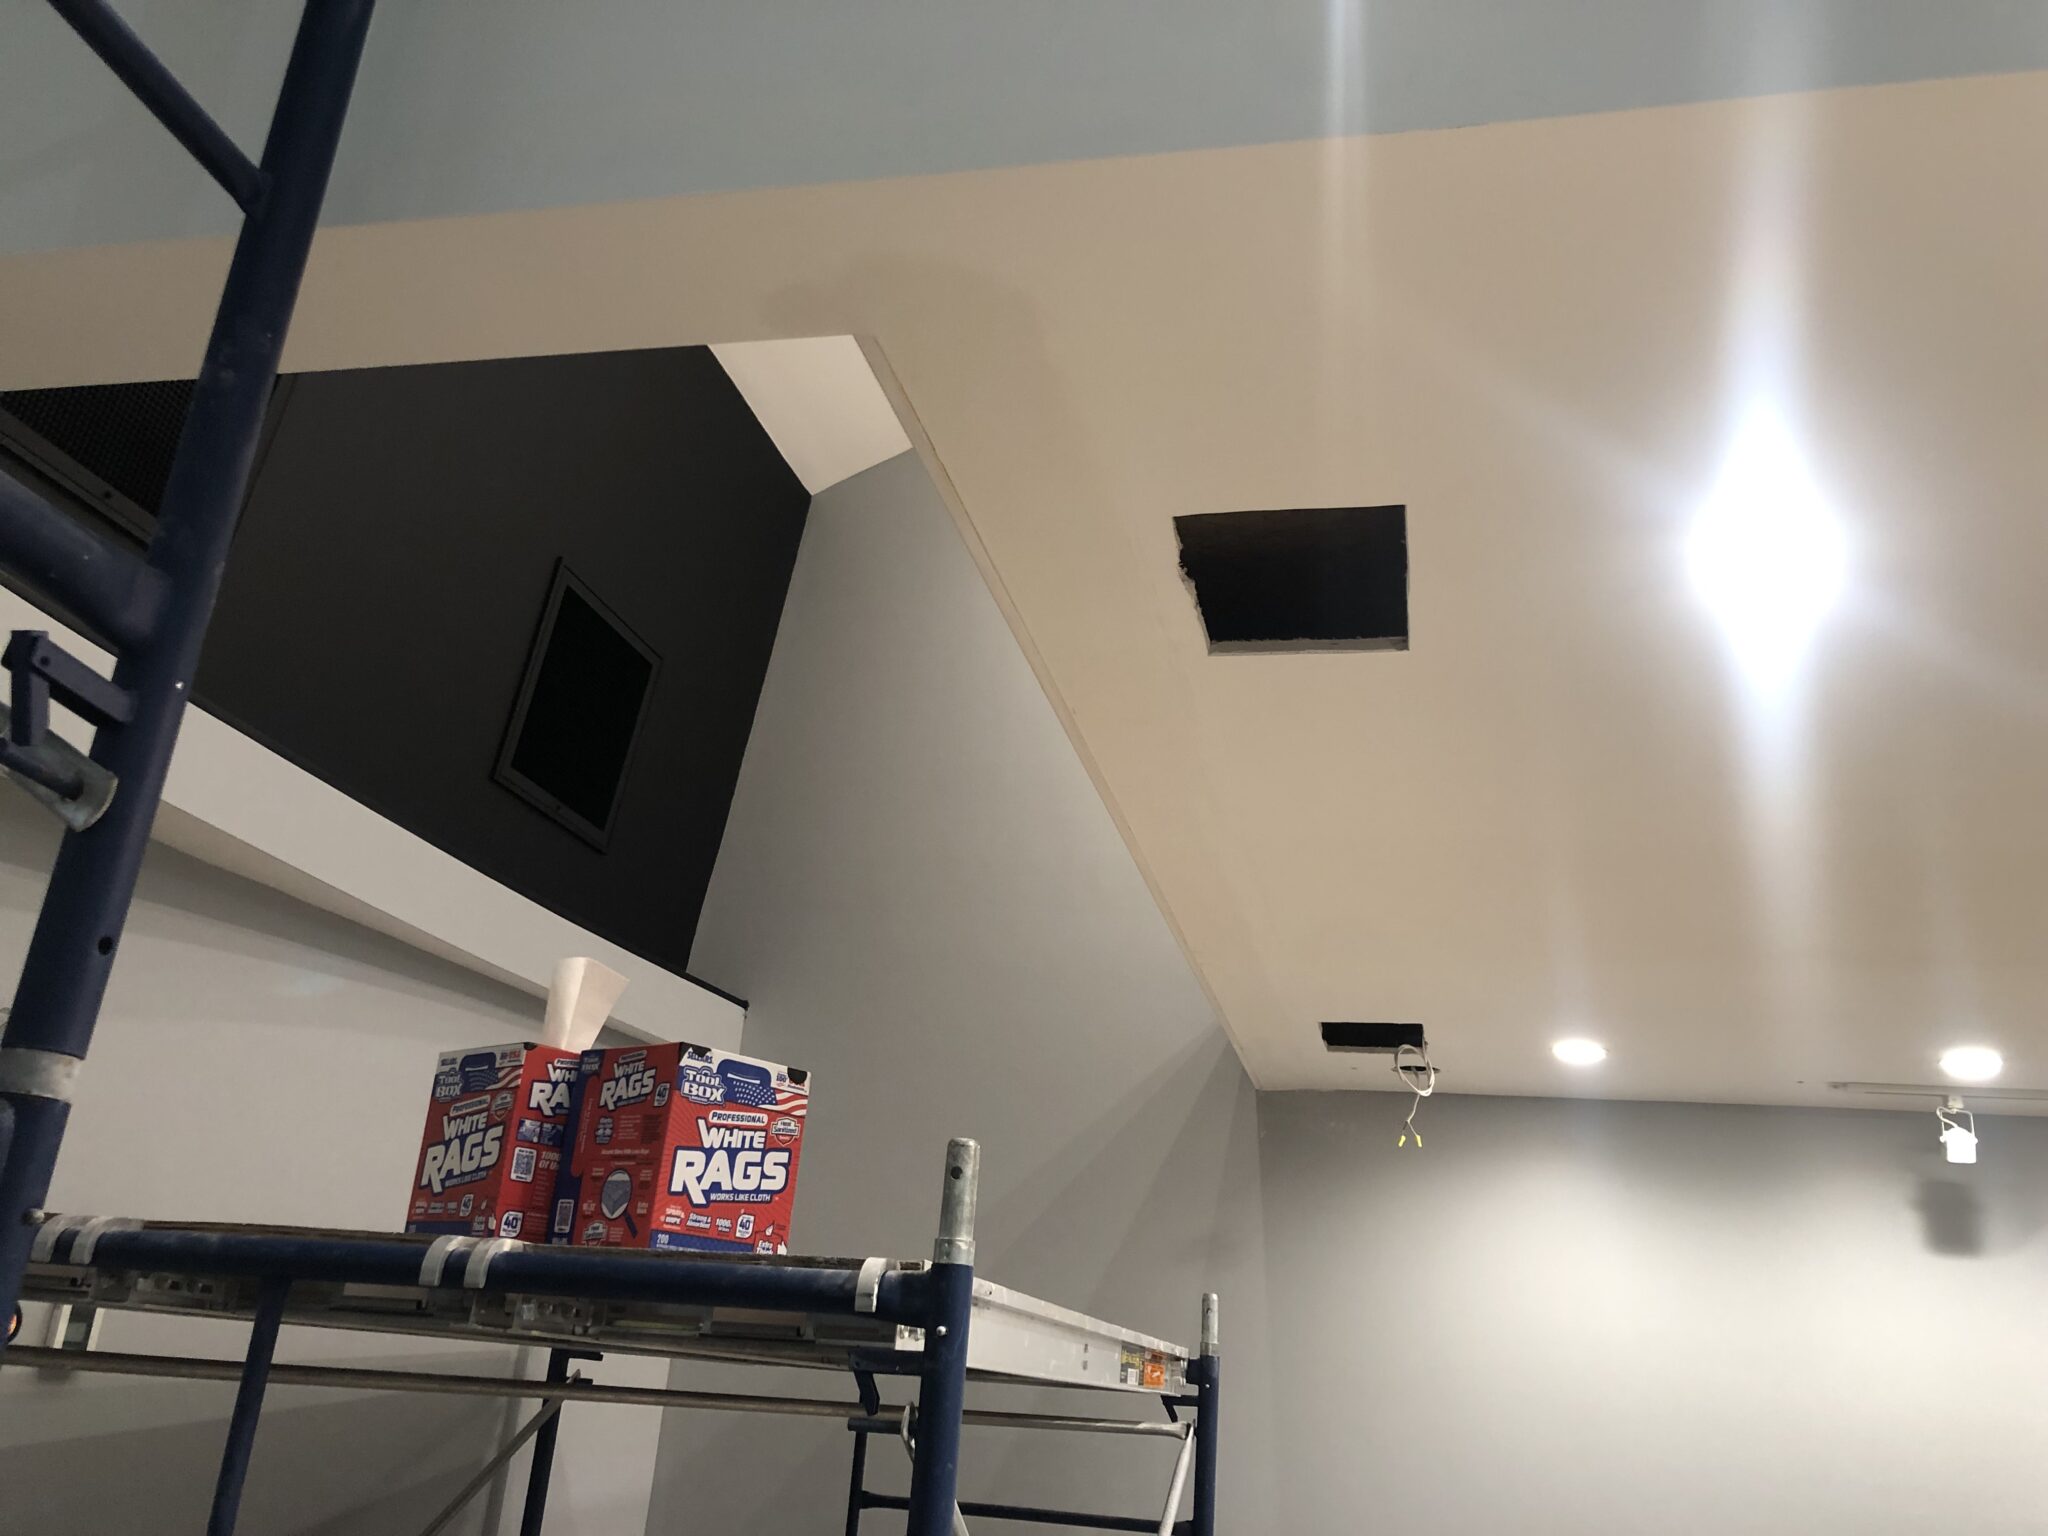
After some final painting of the newly installed trim boards, I was able to move the scaffolding out of the way and Ryan came by to help me get started assembling the staircase.
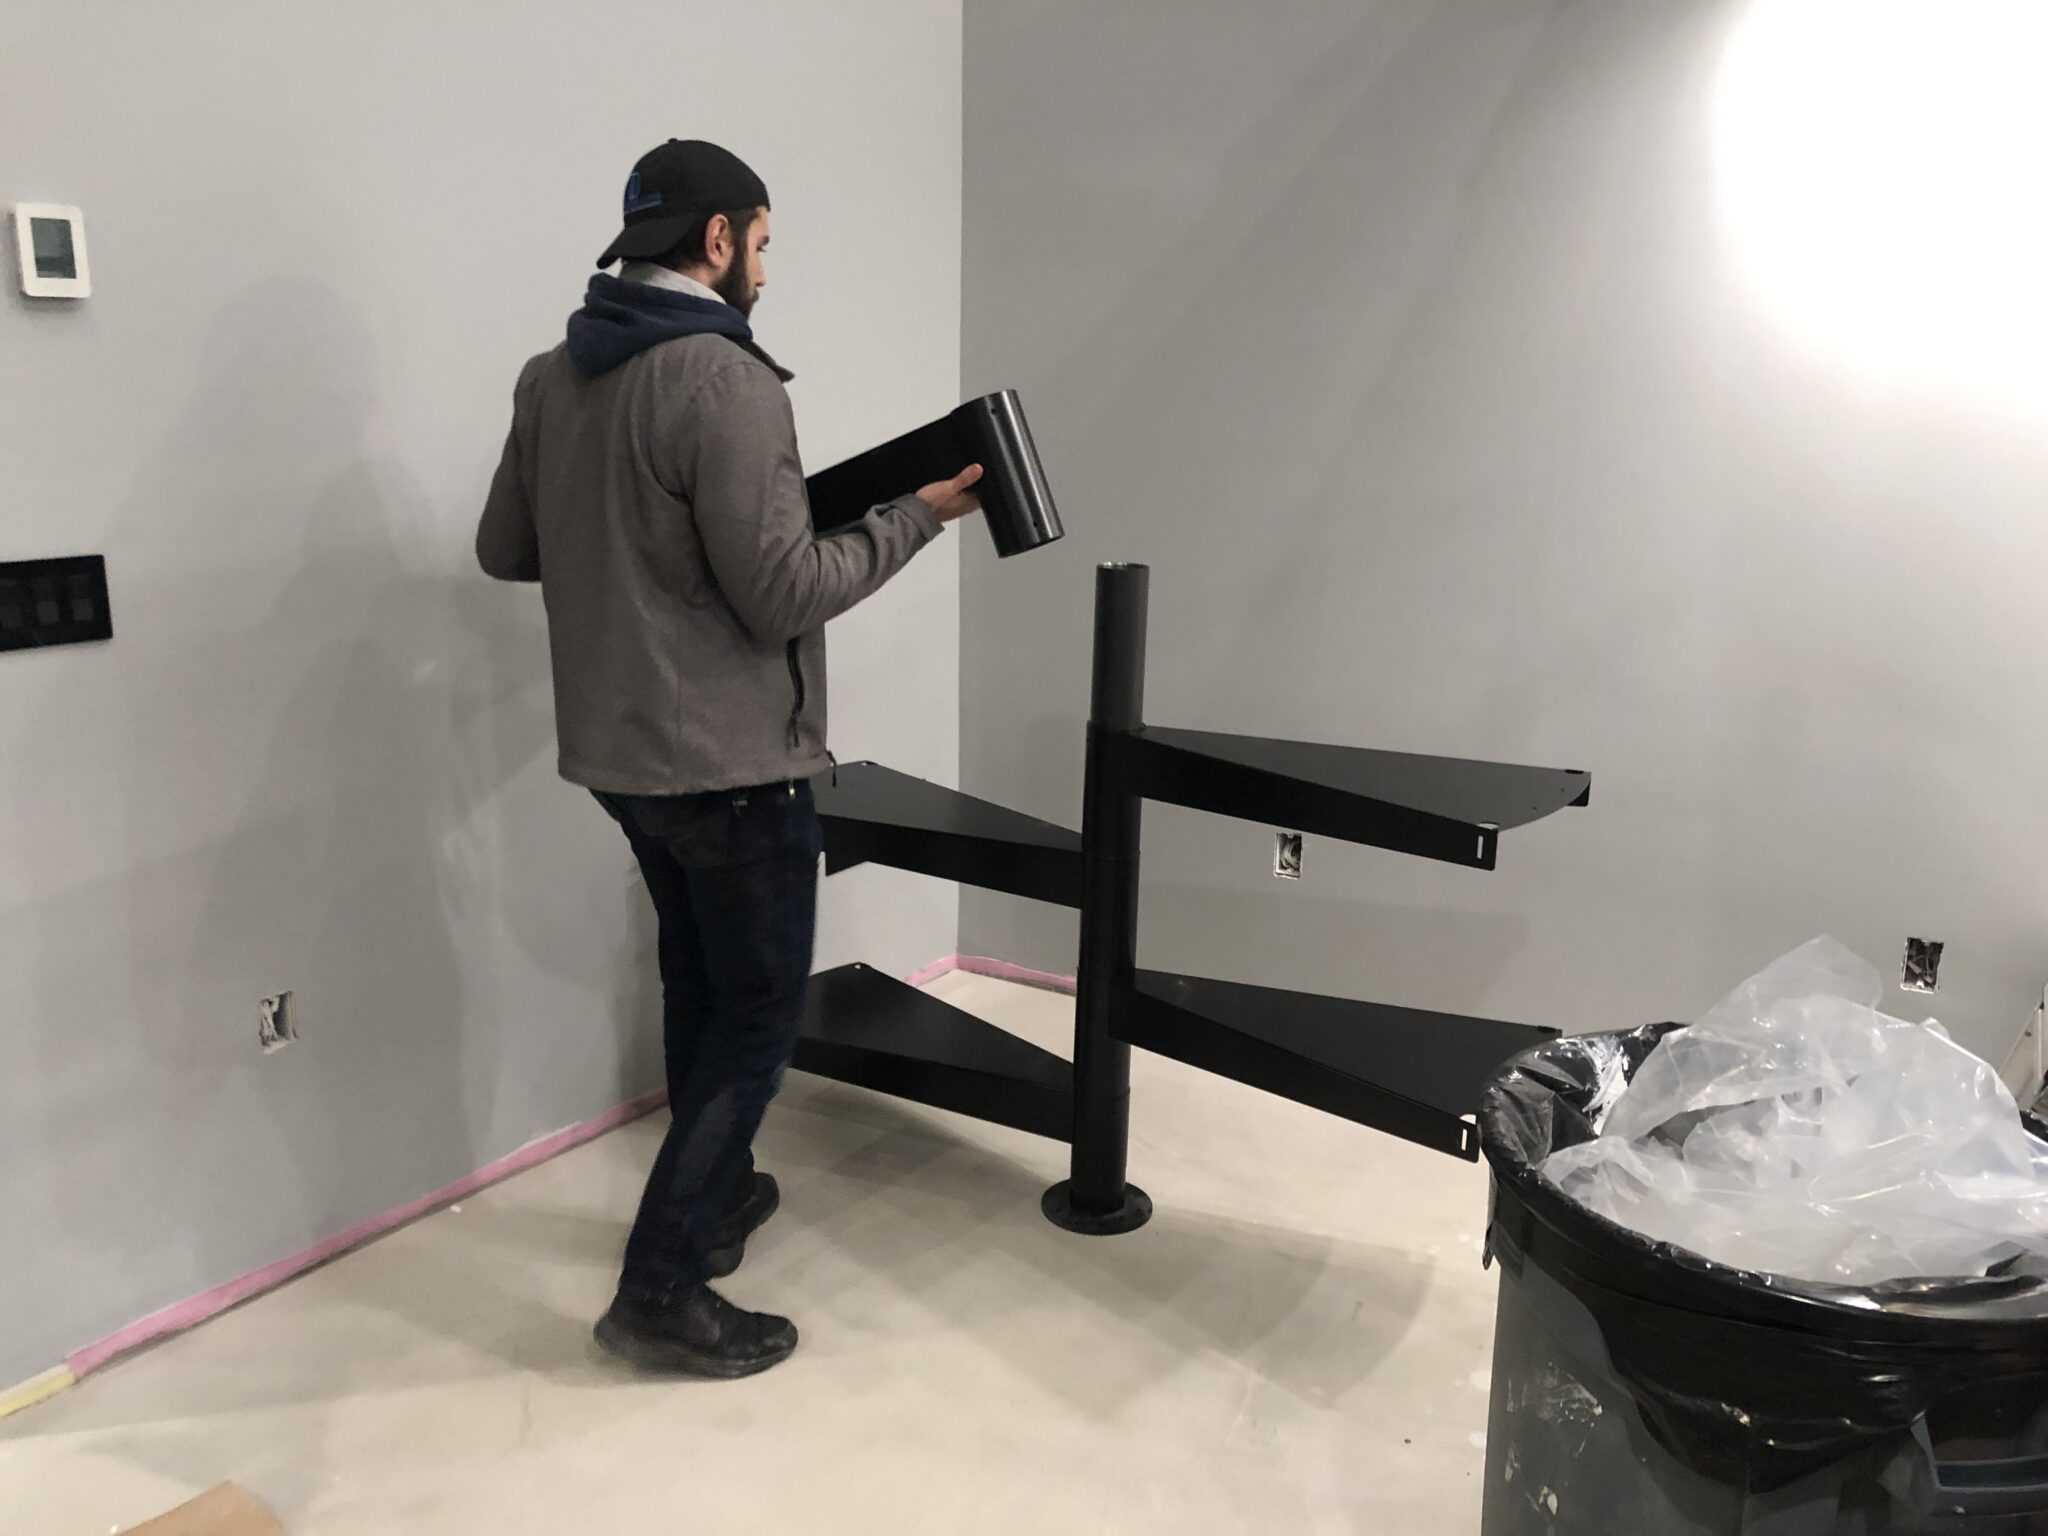
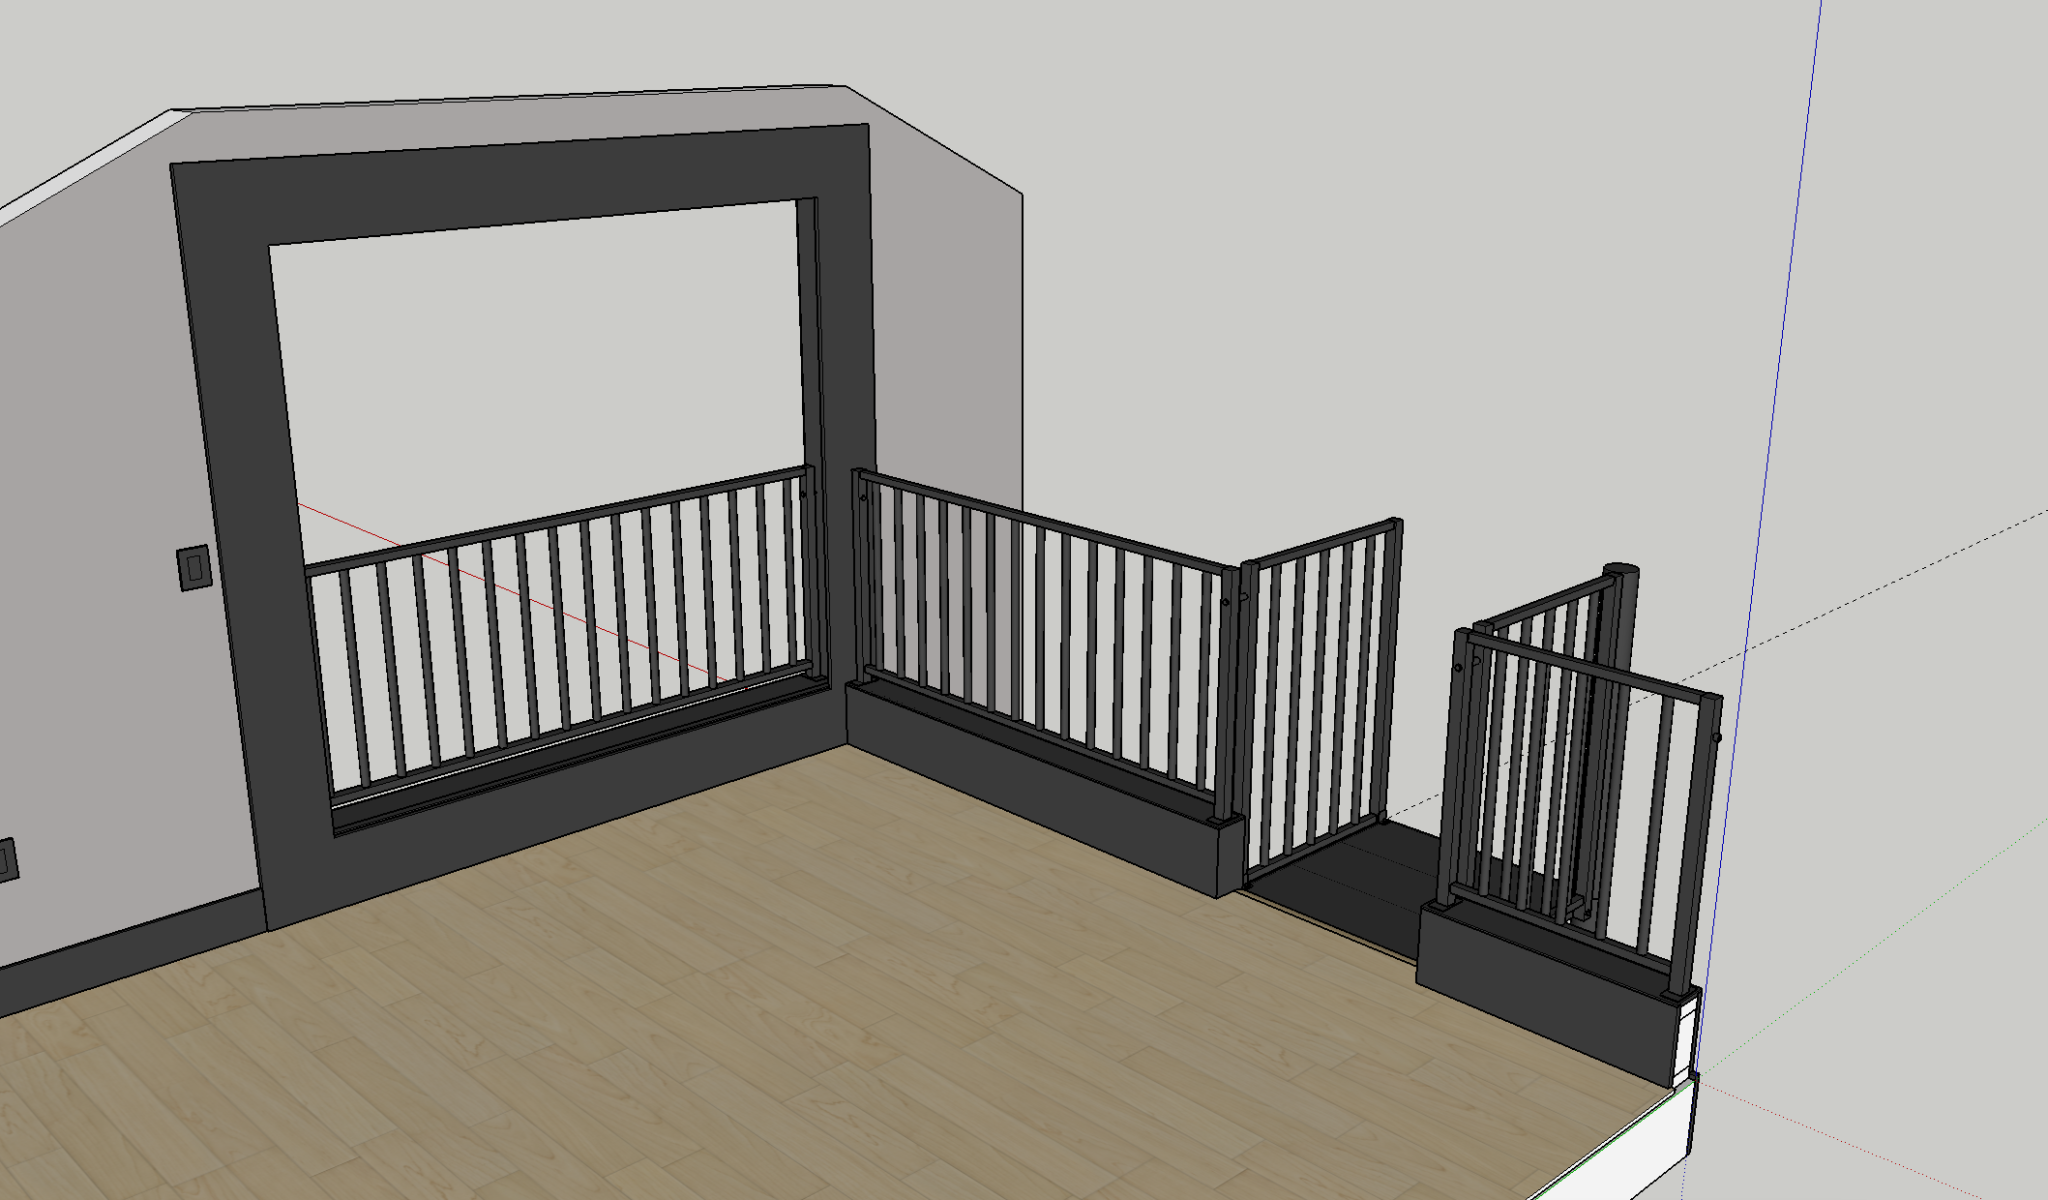
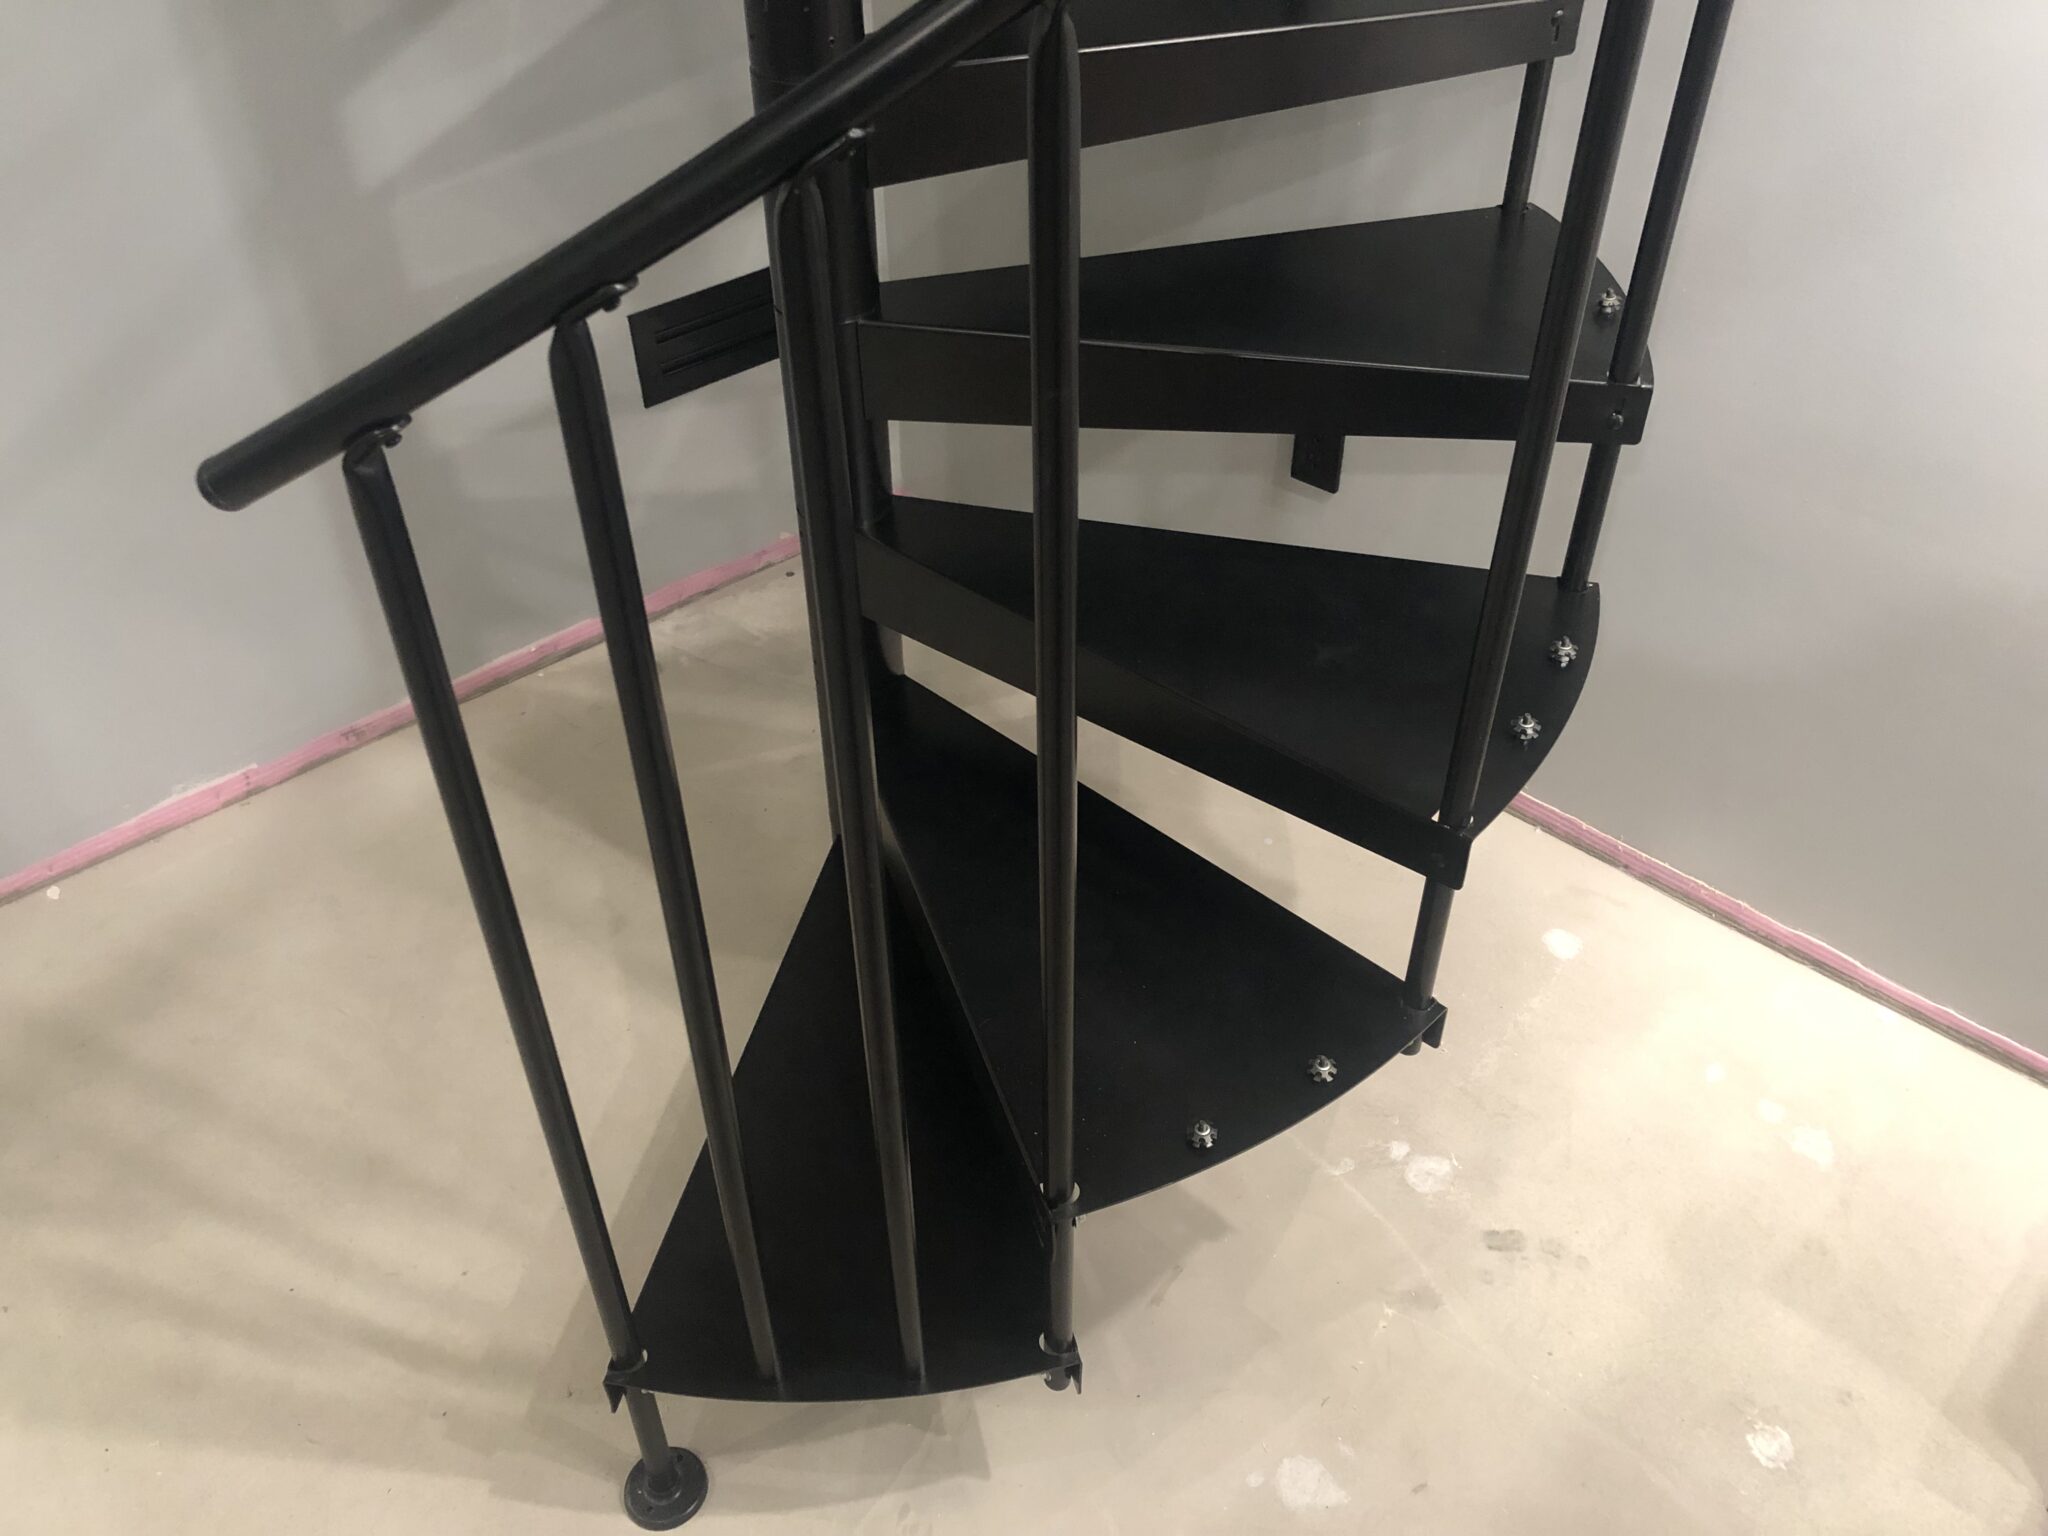
Once we got all 11 treads and the landing assembled, we attached the landing to the loft edge.
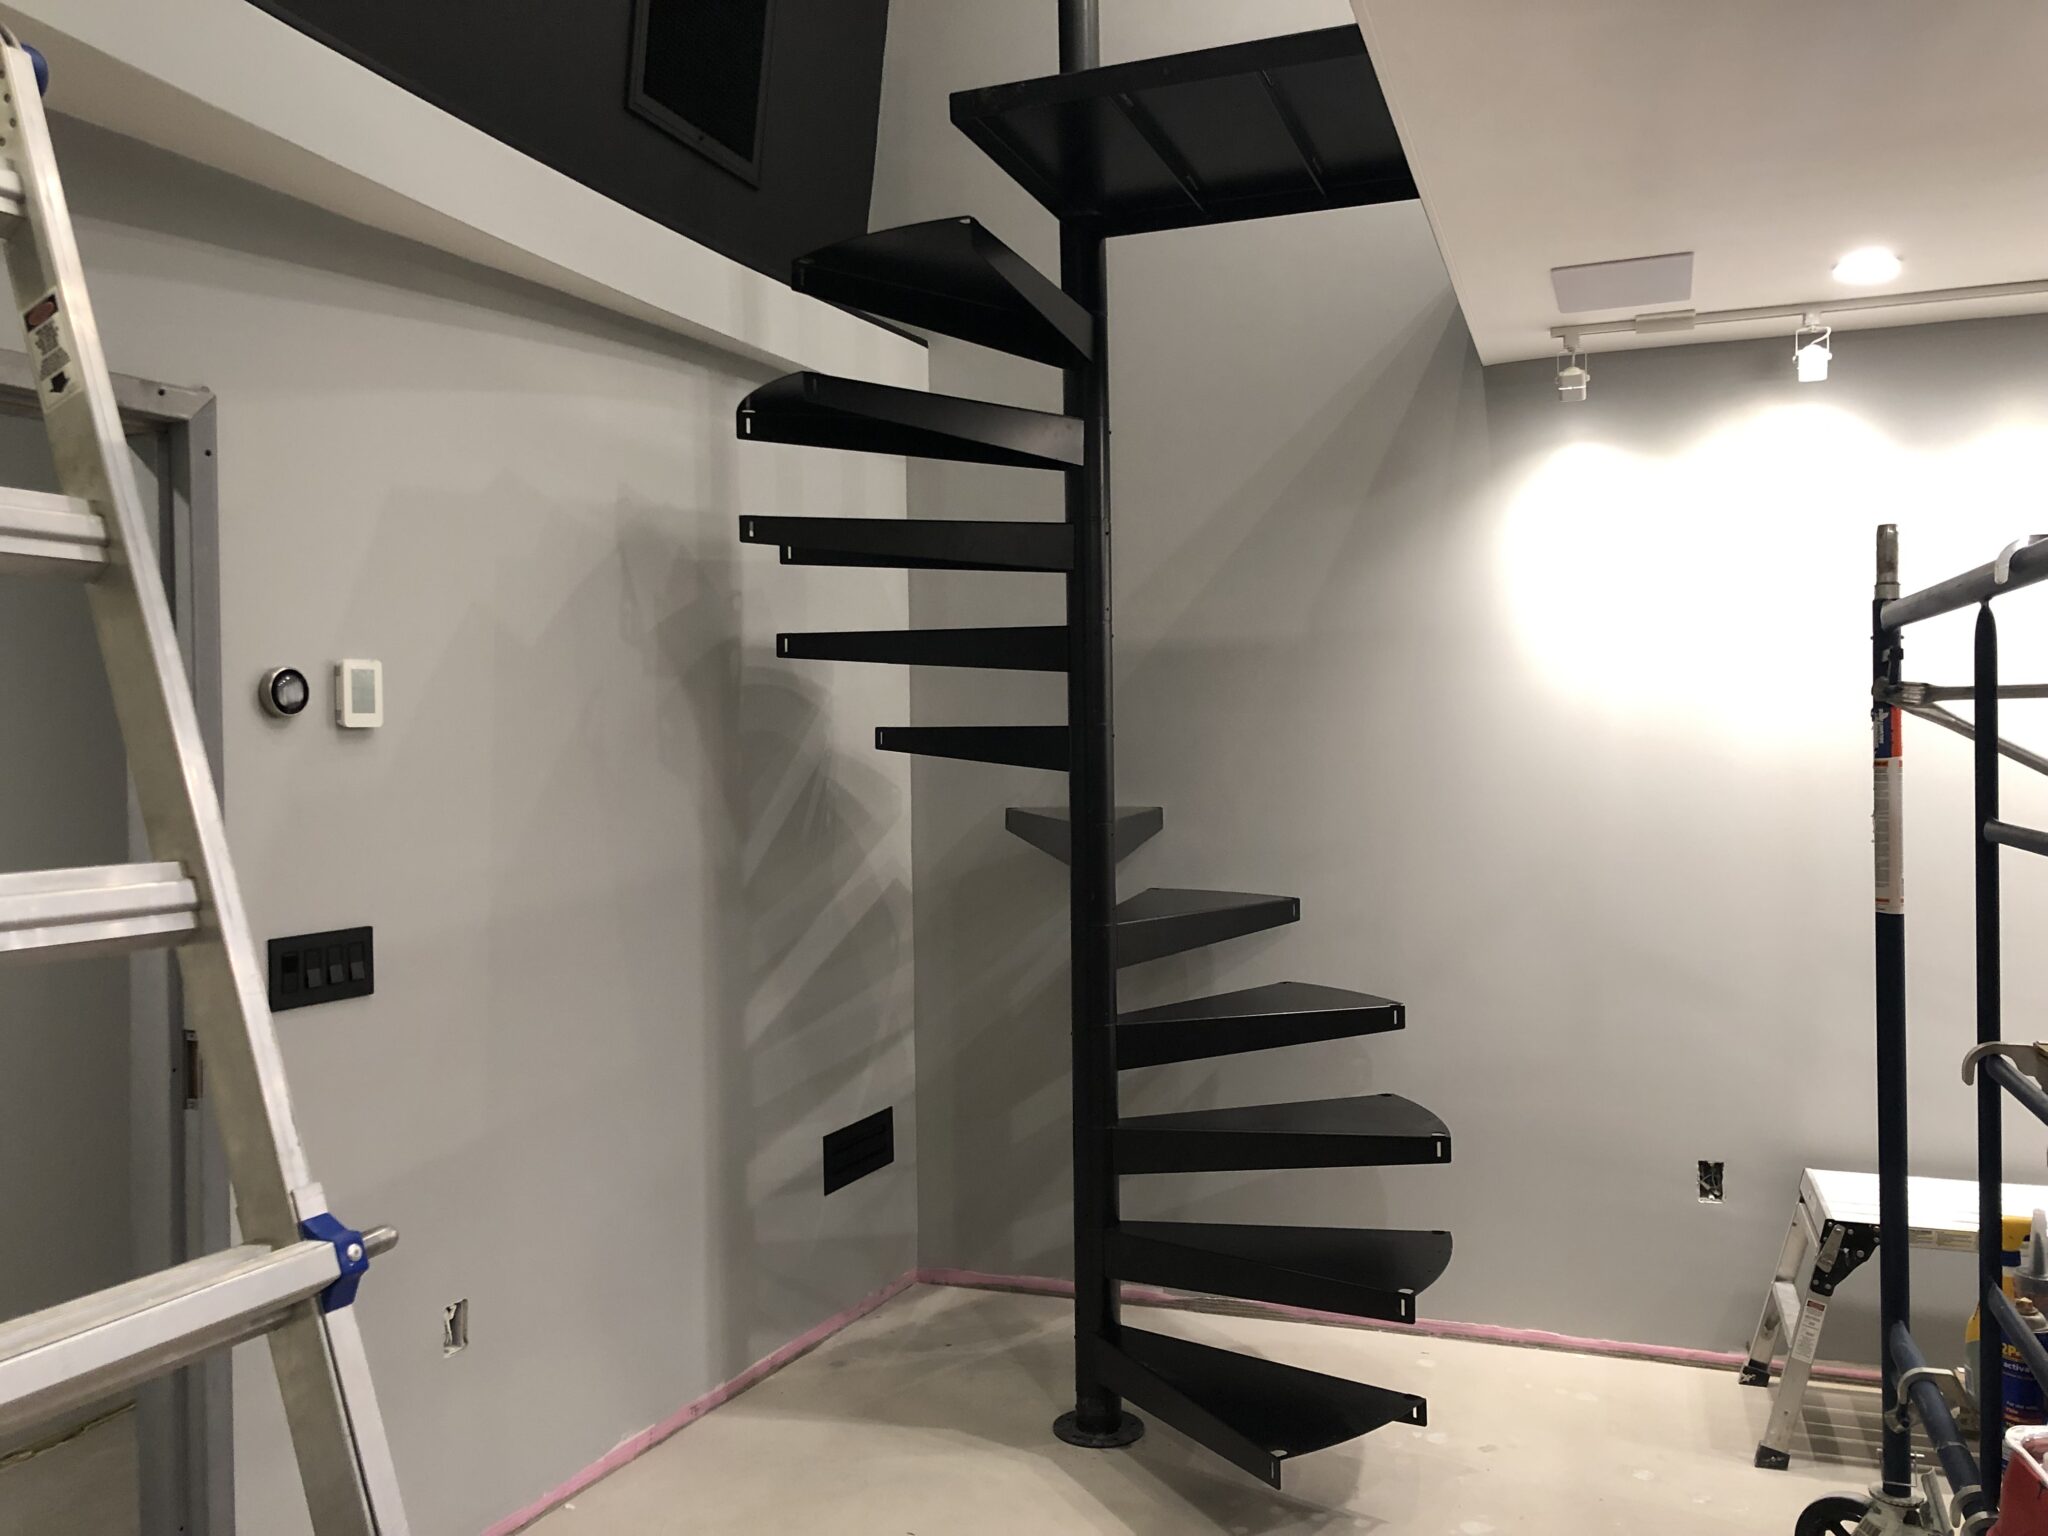
The next day I secured the base of the staircase with concrete anchors and then Adam came by and helped me attach the main balusters and set each step in their exact location.

We decided the lower baluster, which requires trimming, should make contact with the slab, and the hardwood will go in around it.
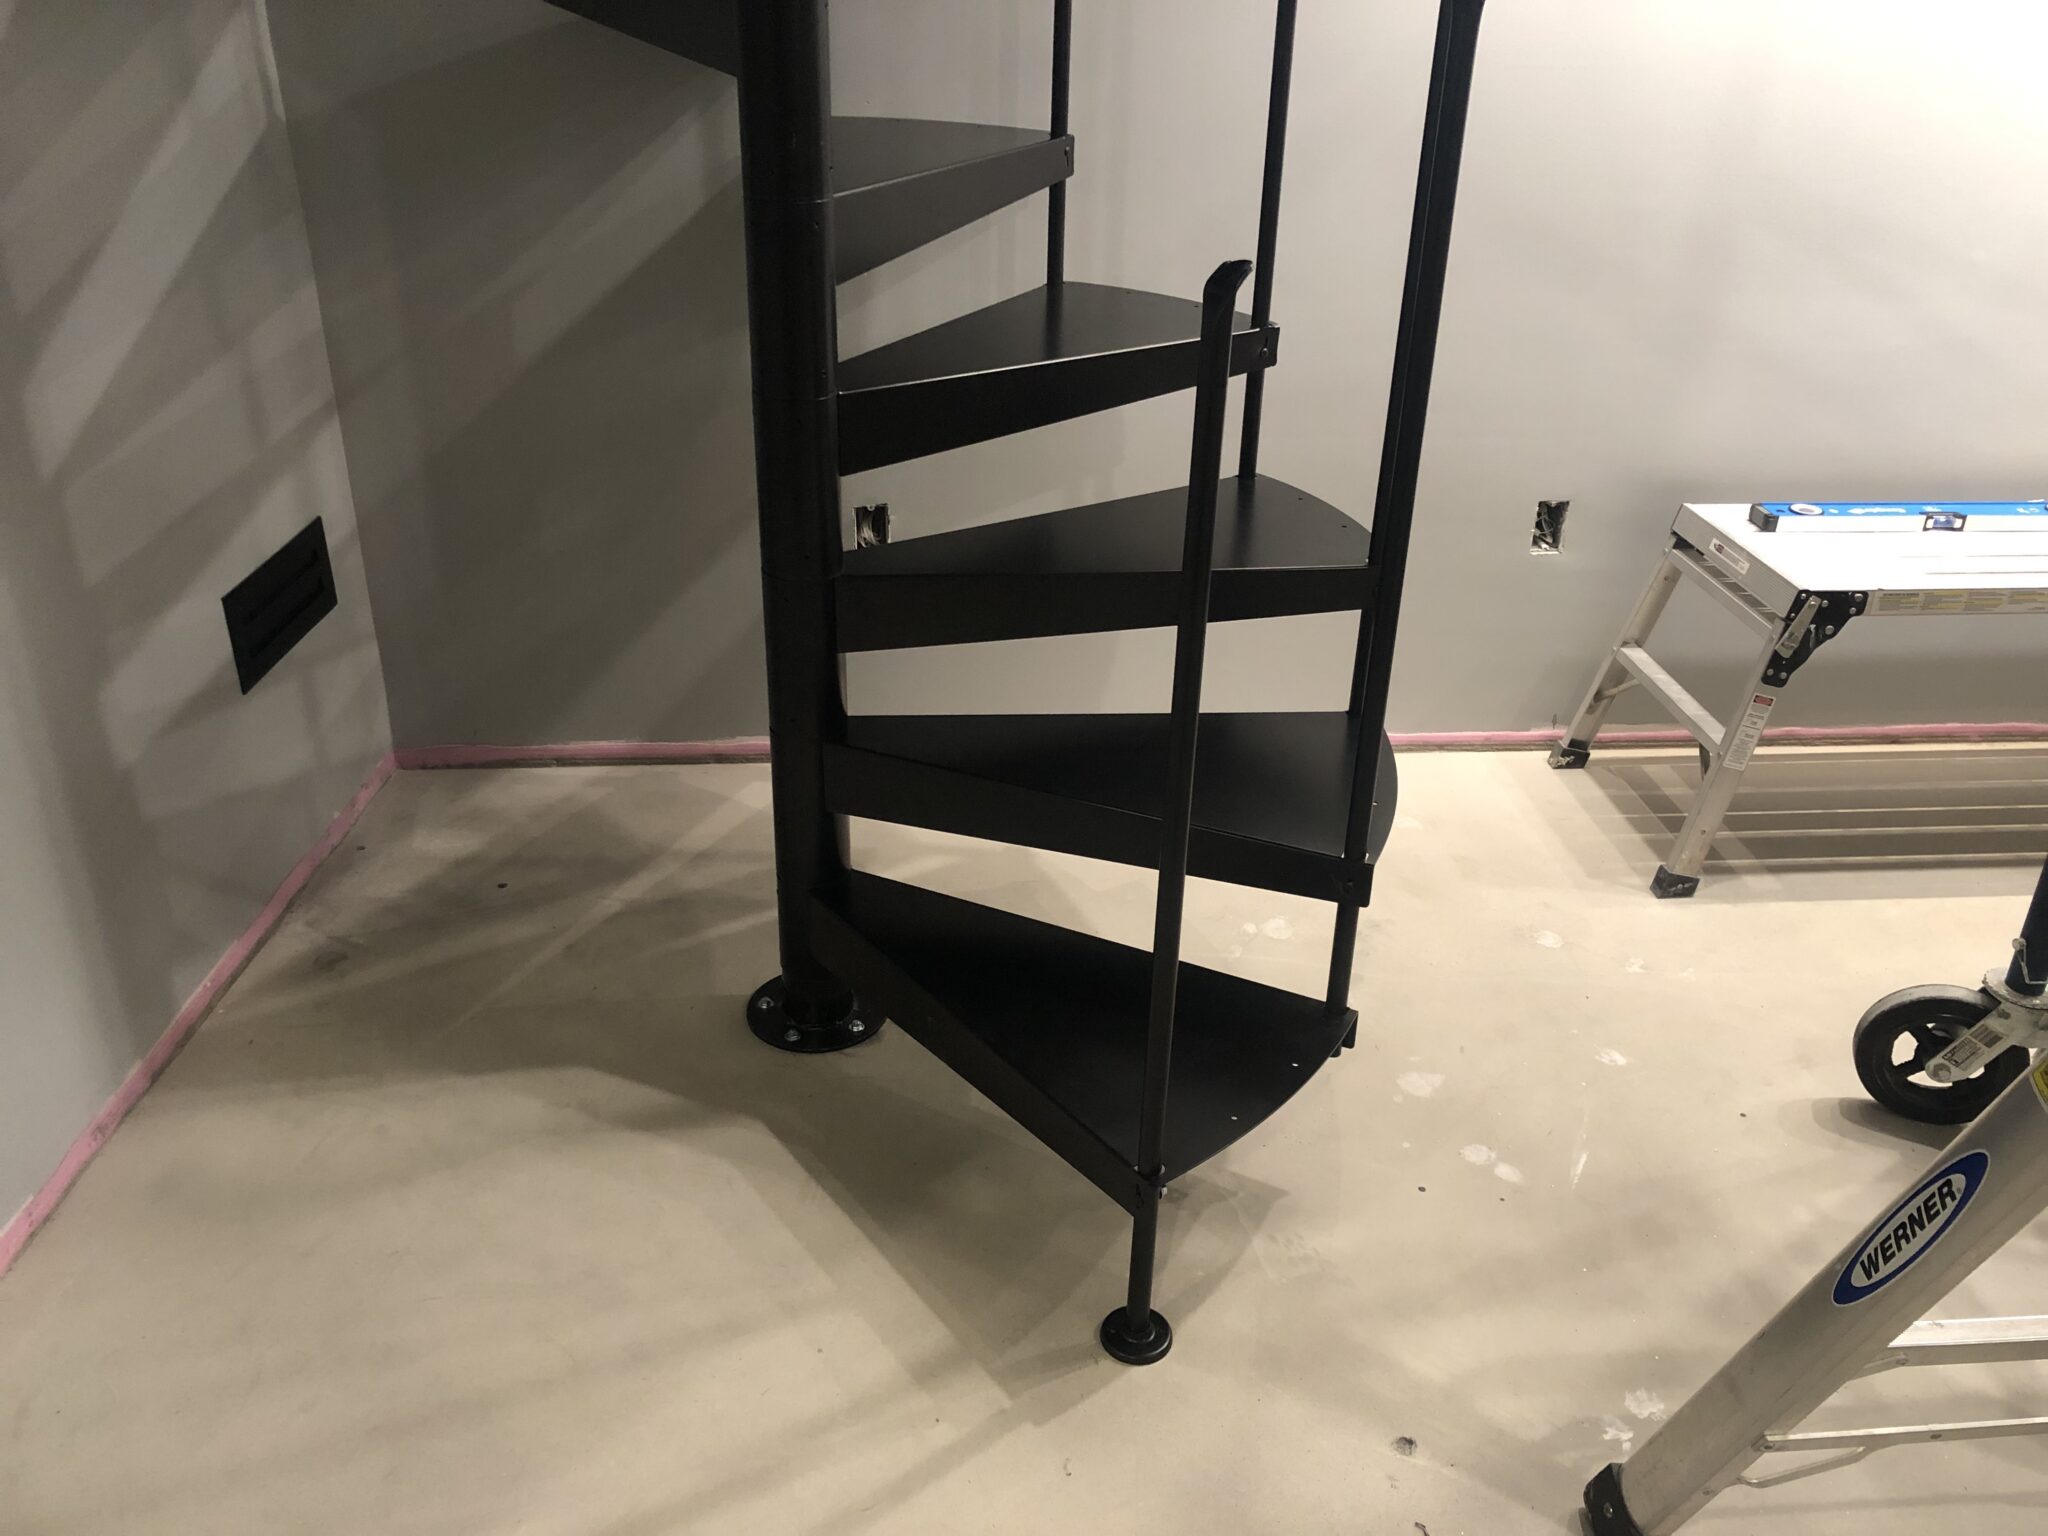
For added strength, I placed an anchor bolt with a stainless fender washer beneath the baluster, ensuring it doesn’t dig into the softer floor-leveler or corrode due to direct contact with the slab.

The next day I managed to form and install the handrail by myself without incident, despite the instructions saying it was at least a two-man job.

Now that I knew exactly where the landing was, I framed the curb that the balcony railings will sit atop. This ensures that both balconies begin at the same height and can thus use matching railings.

I was also finally able to order custom railings from the same company that made the staircase.
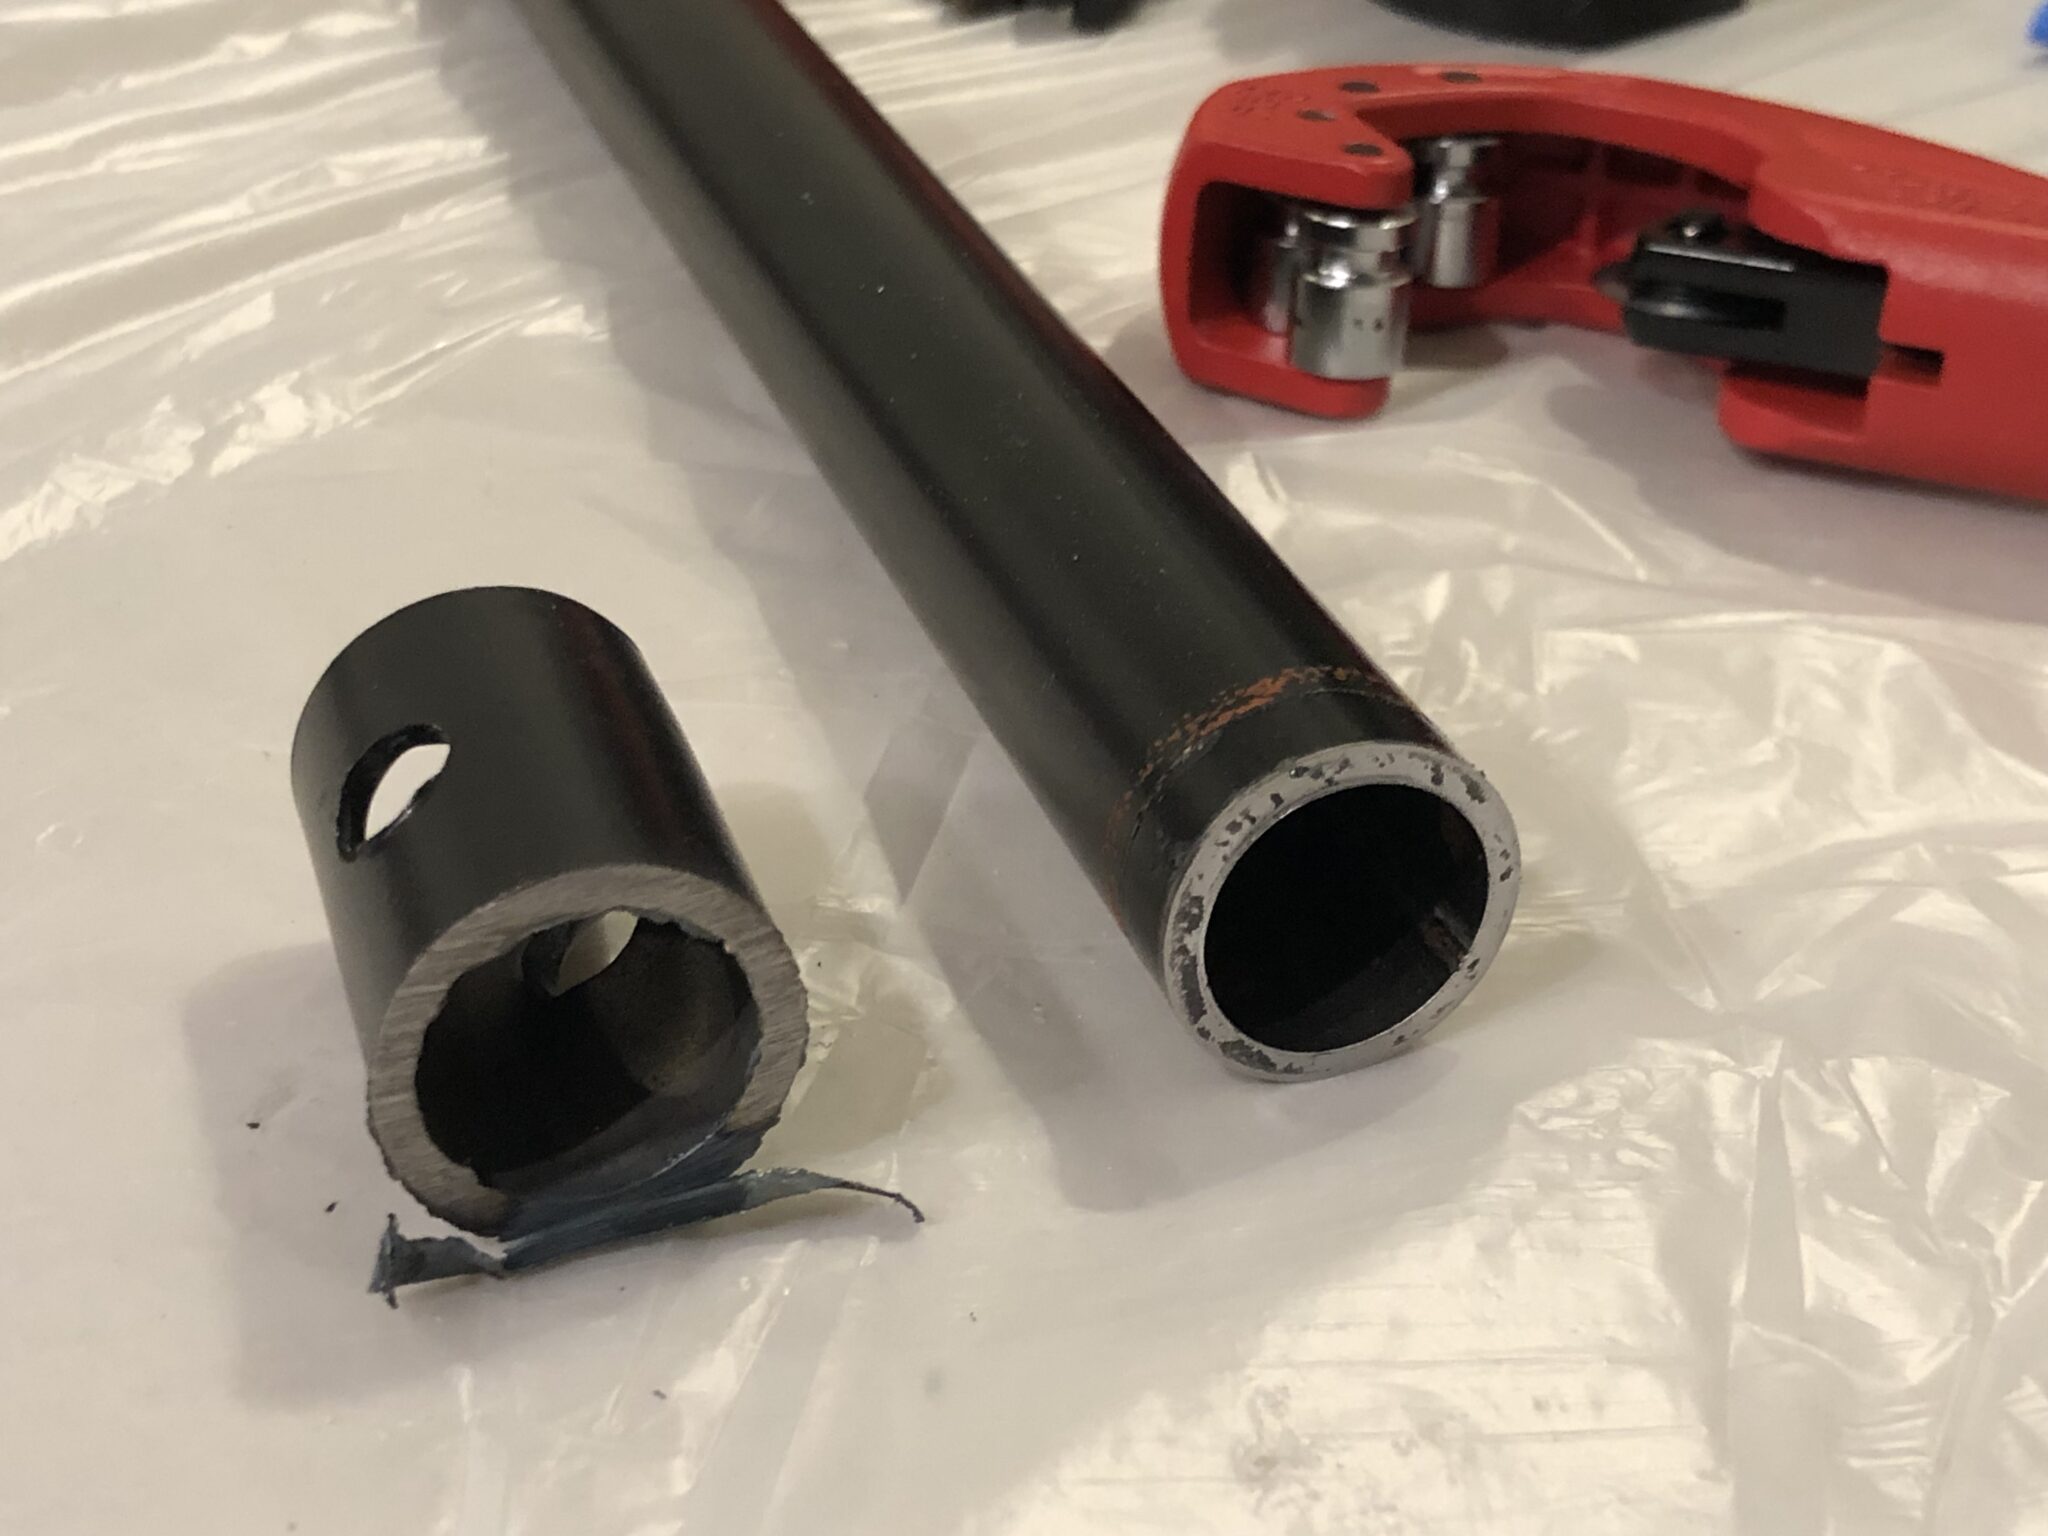
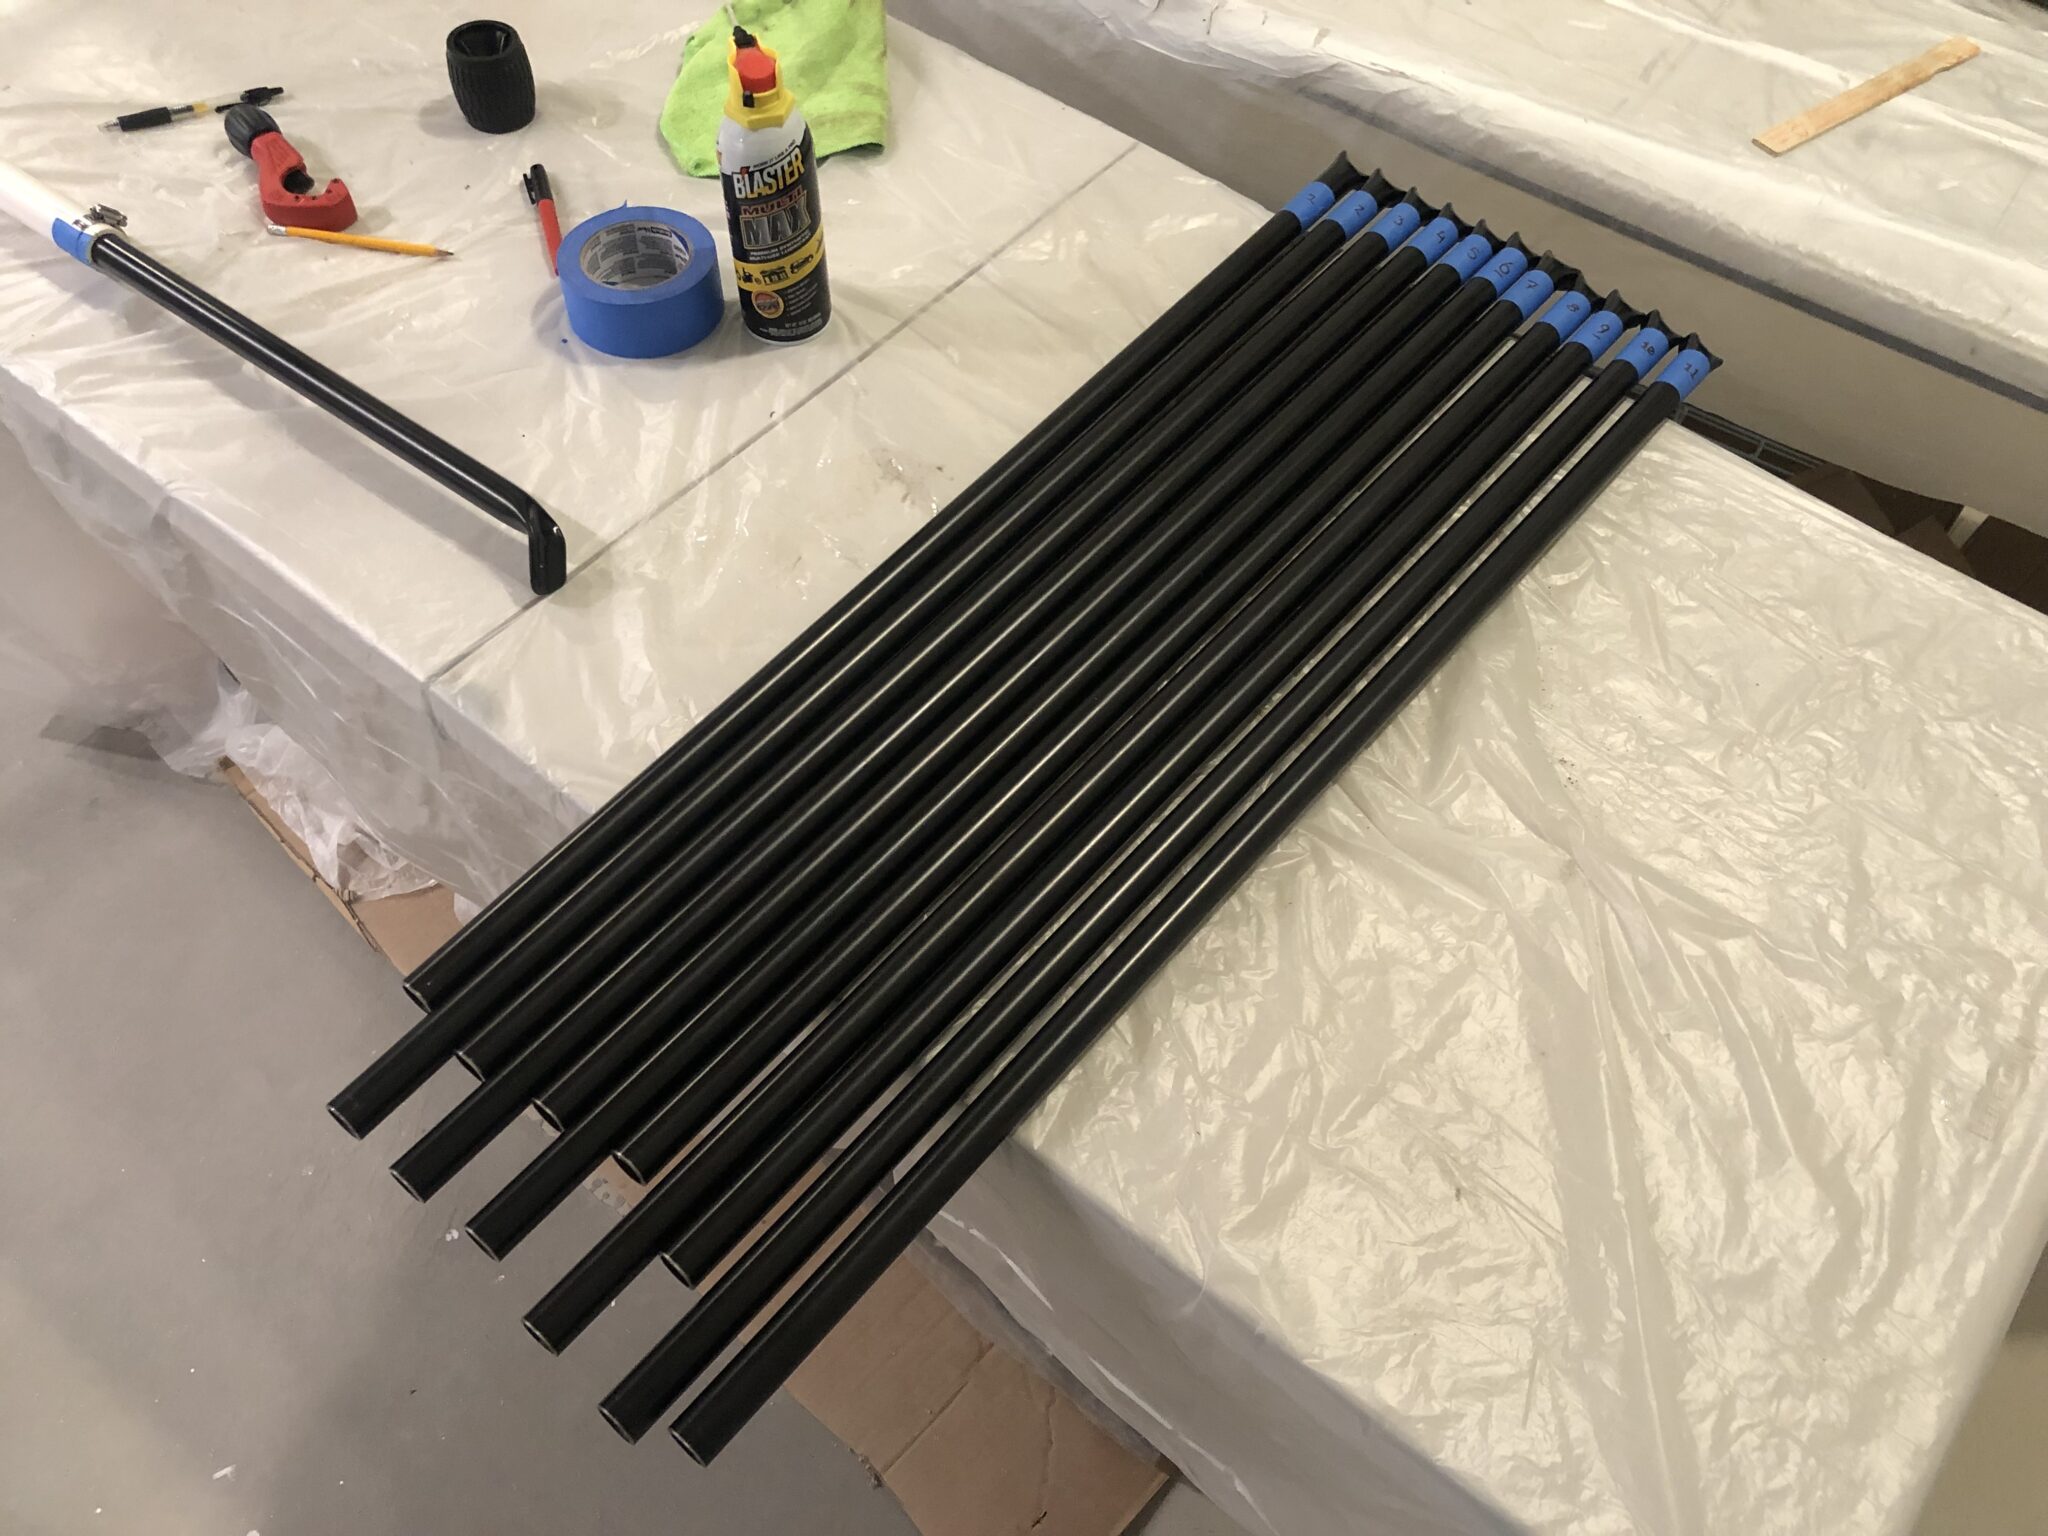
Next, it was time to install the middle balusters, of which there are two-per-step. My first idea was to go buy a cutoff machine, which I was planning to buy soon anyway for another project.

However, the results of cutting balusters with this machine were dissapointing.

I consulted with my brother, who is an extraordinary metal worker, and he suggested I use a pipe cutter designed to cut copper pipe. Though I did need to go slower, the tool easily made perfectly square and shockingly clean cuts without the dangerous sparks and horrible smells of a cutoff machine.
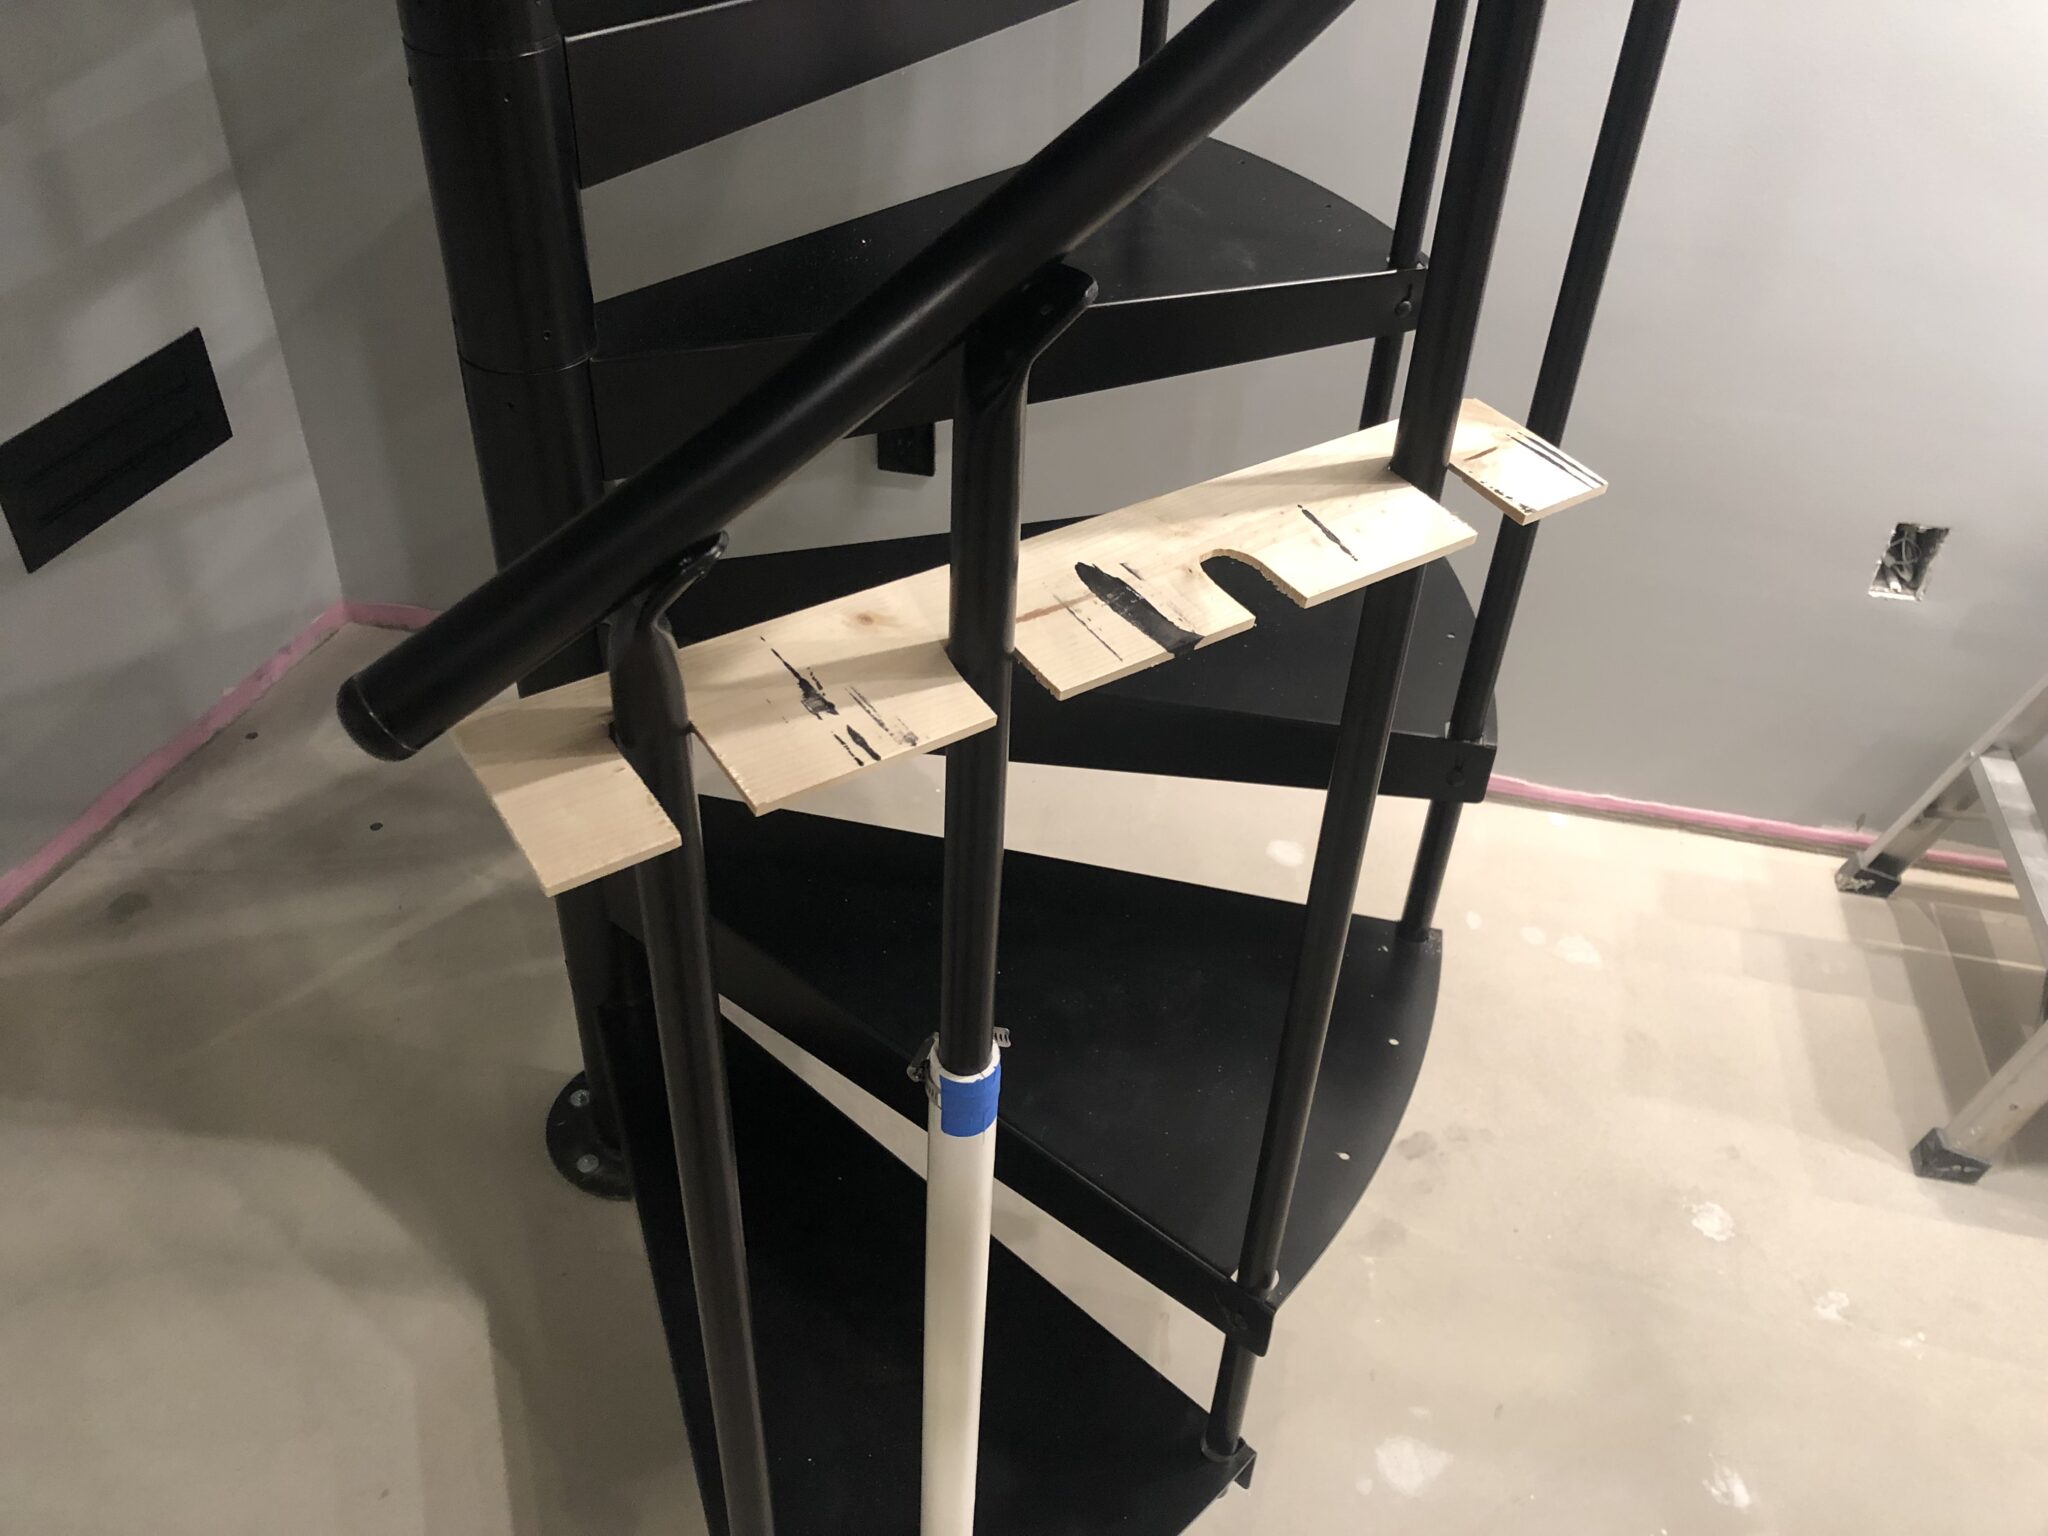
We also discussed some tools that needed to be made. The first tool is designed to measure the length of each middle baluster. I cut a spare baluster short and fit a PVC pipe over it. A few notches in the PVC pipe and a host clamp made it easy to lock it in place once I’d found the right length. The other tool we came up with was a spacer to ensure balusters were in the right place when measuring them.
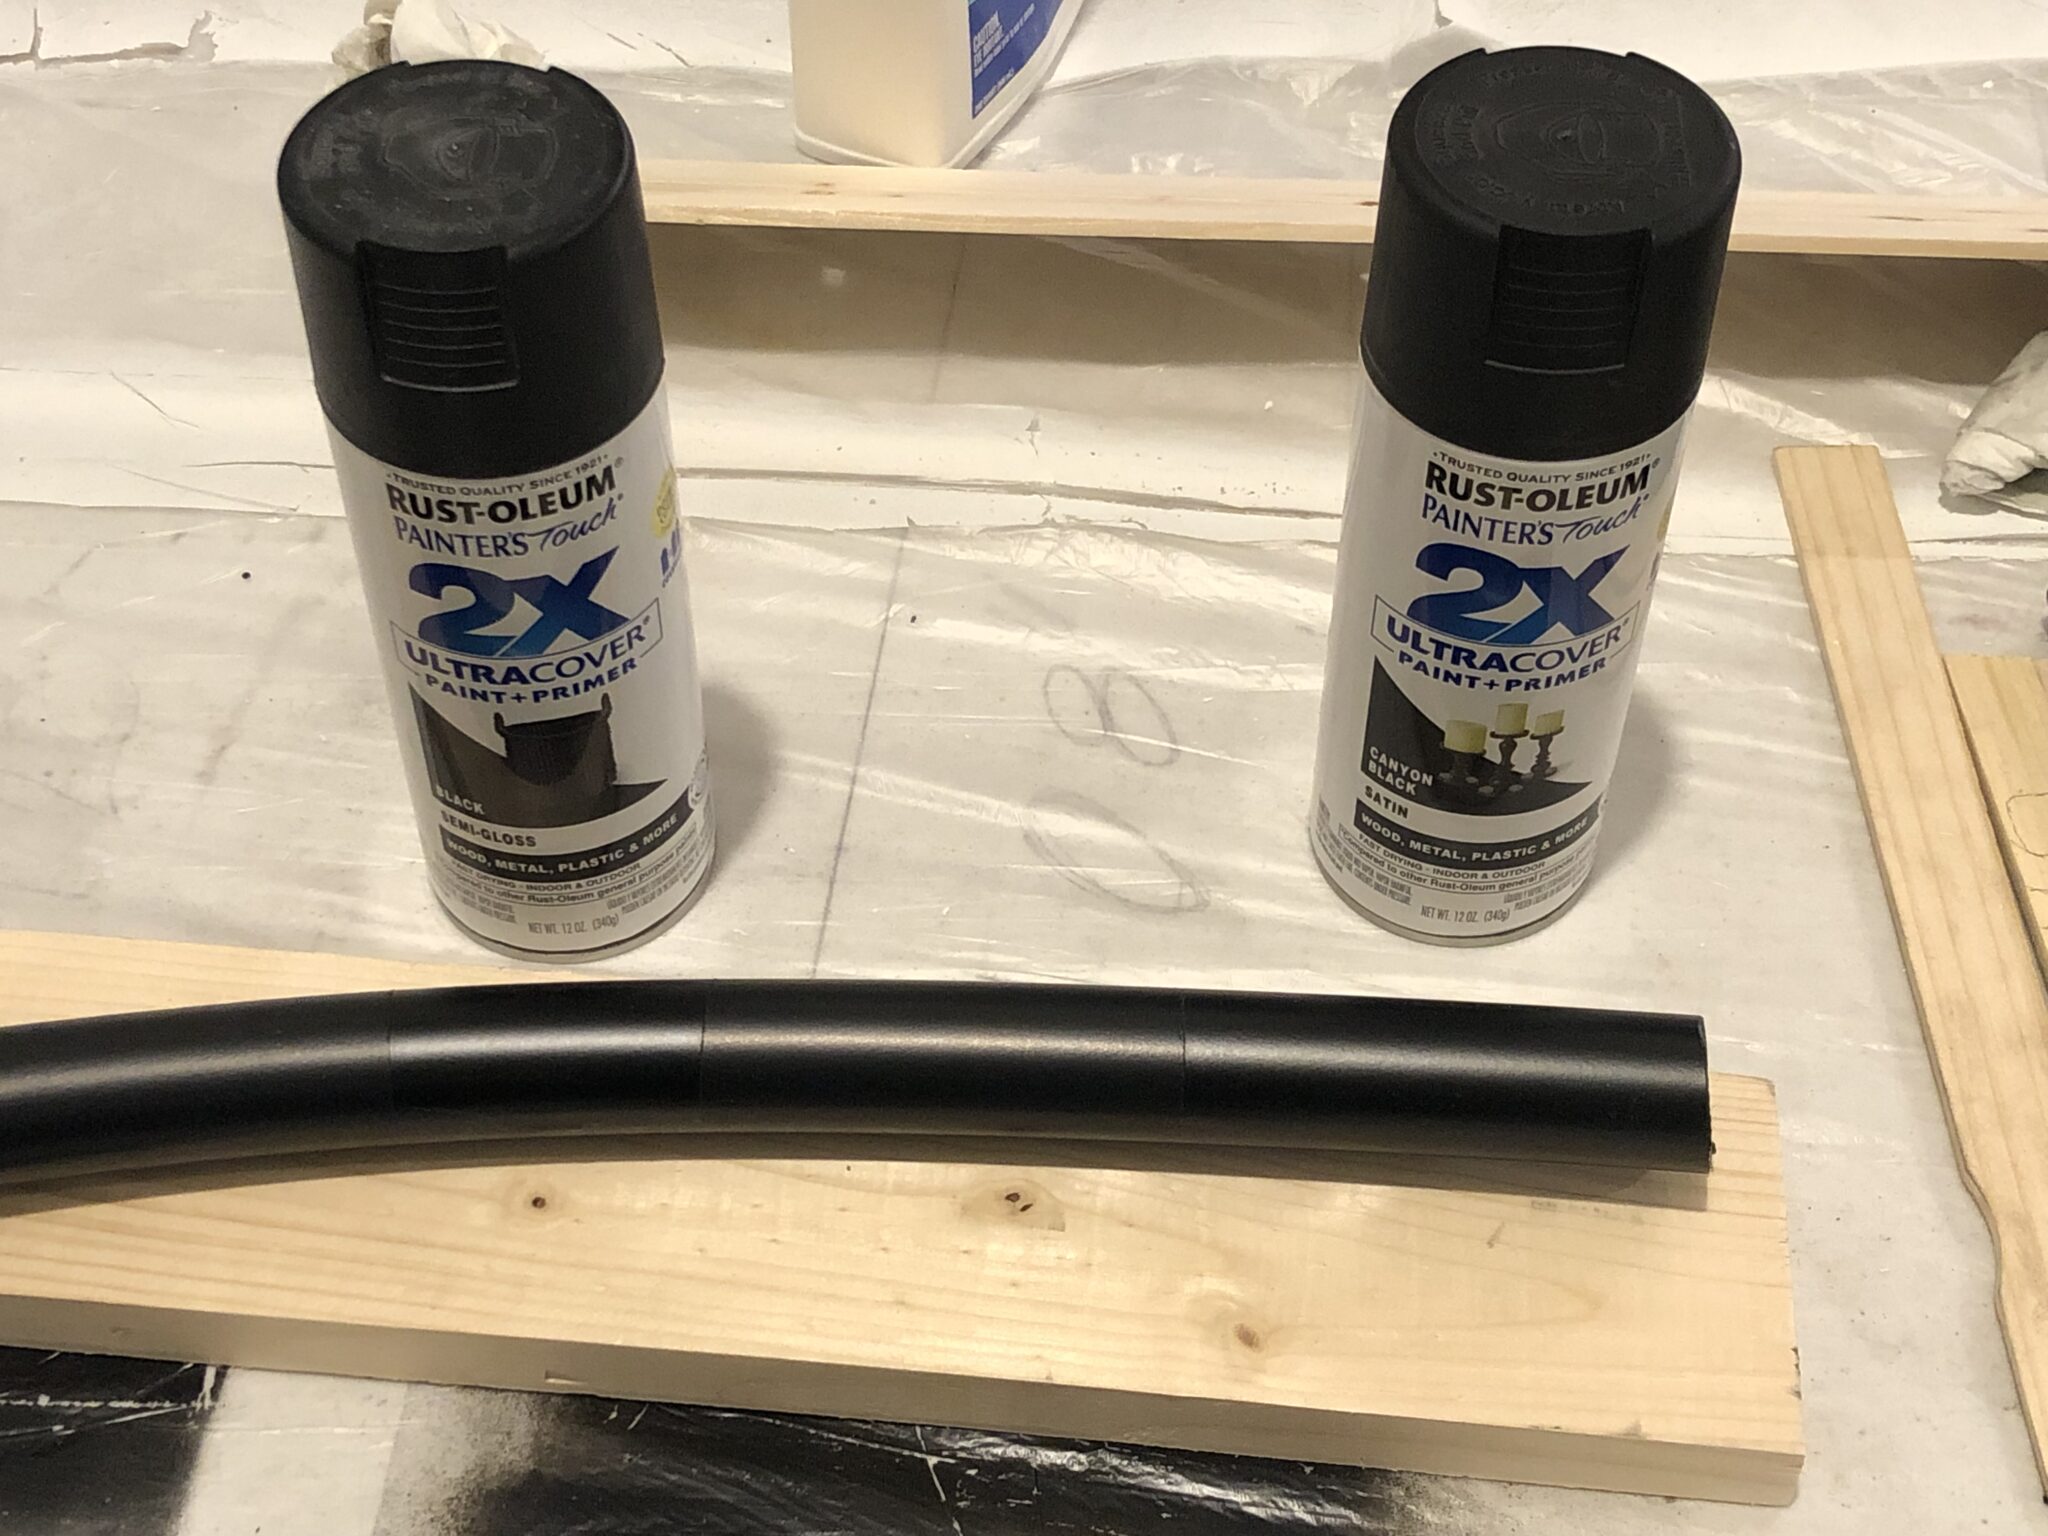
I realized that once I cut the balusters, the raw steel would be exposed and ultimately rust, so I needed to find a paint that matched the sheen of the powder coating. I tested both a semi-gloss and a satin on a spare piece of handrail, and found the satin was a much closer match.
I then measured each middle baluster using the length and spacer tools.

As I cut each one, I checked the fit, numbered them and set them aside.
I then painted the ends with satin black paint, to ensure no raw steel was exposed.
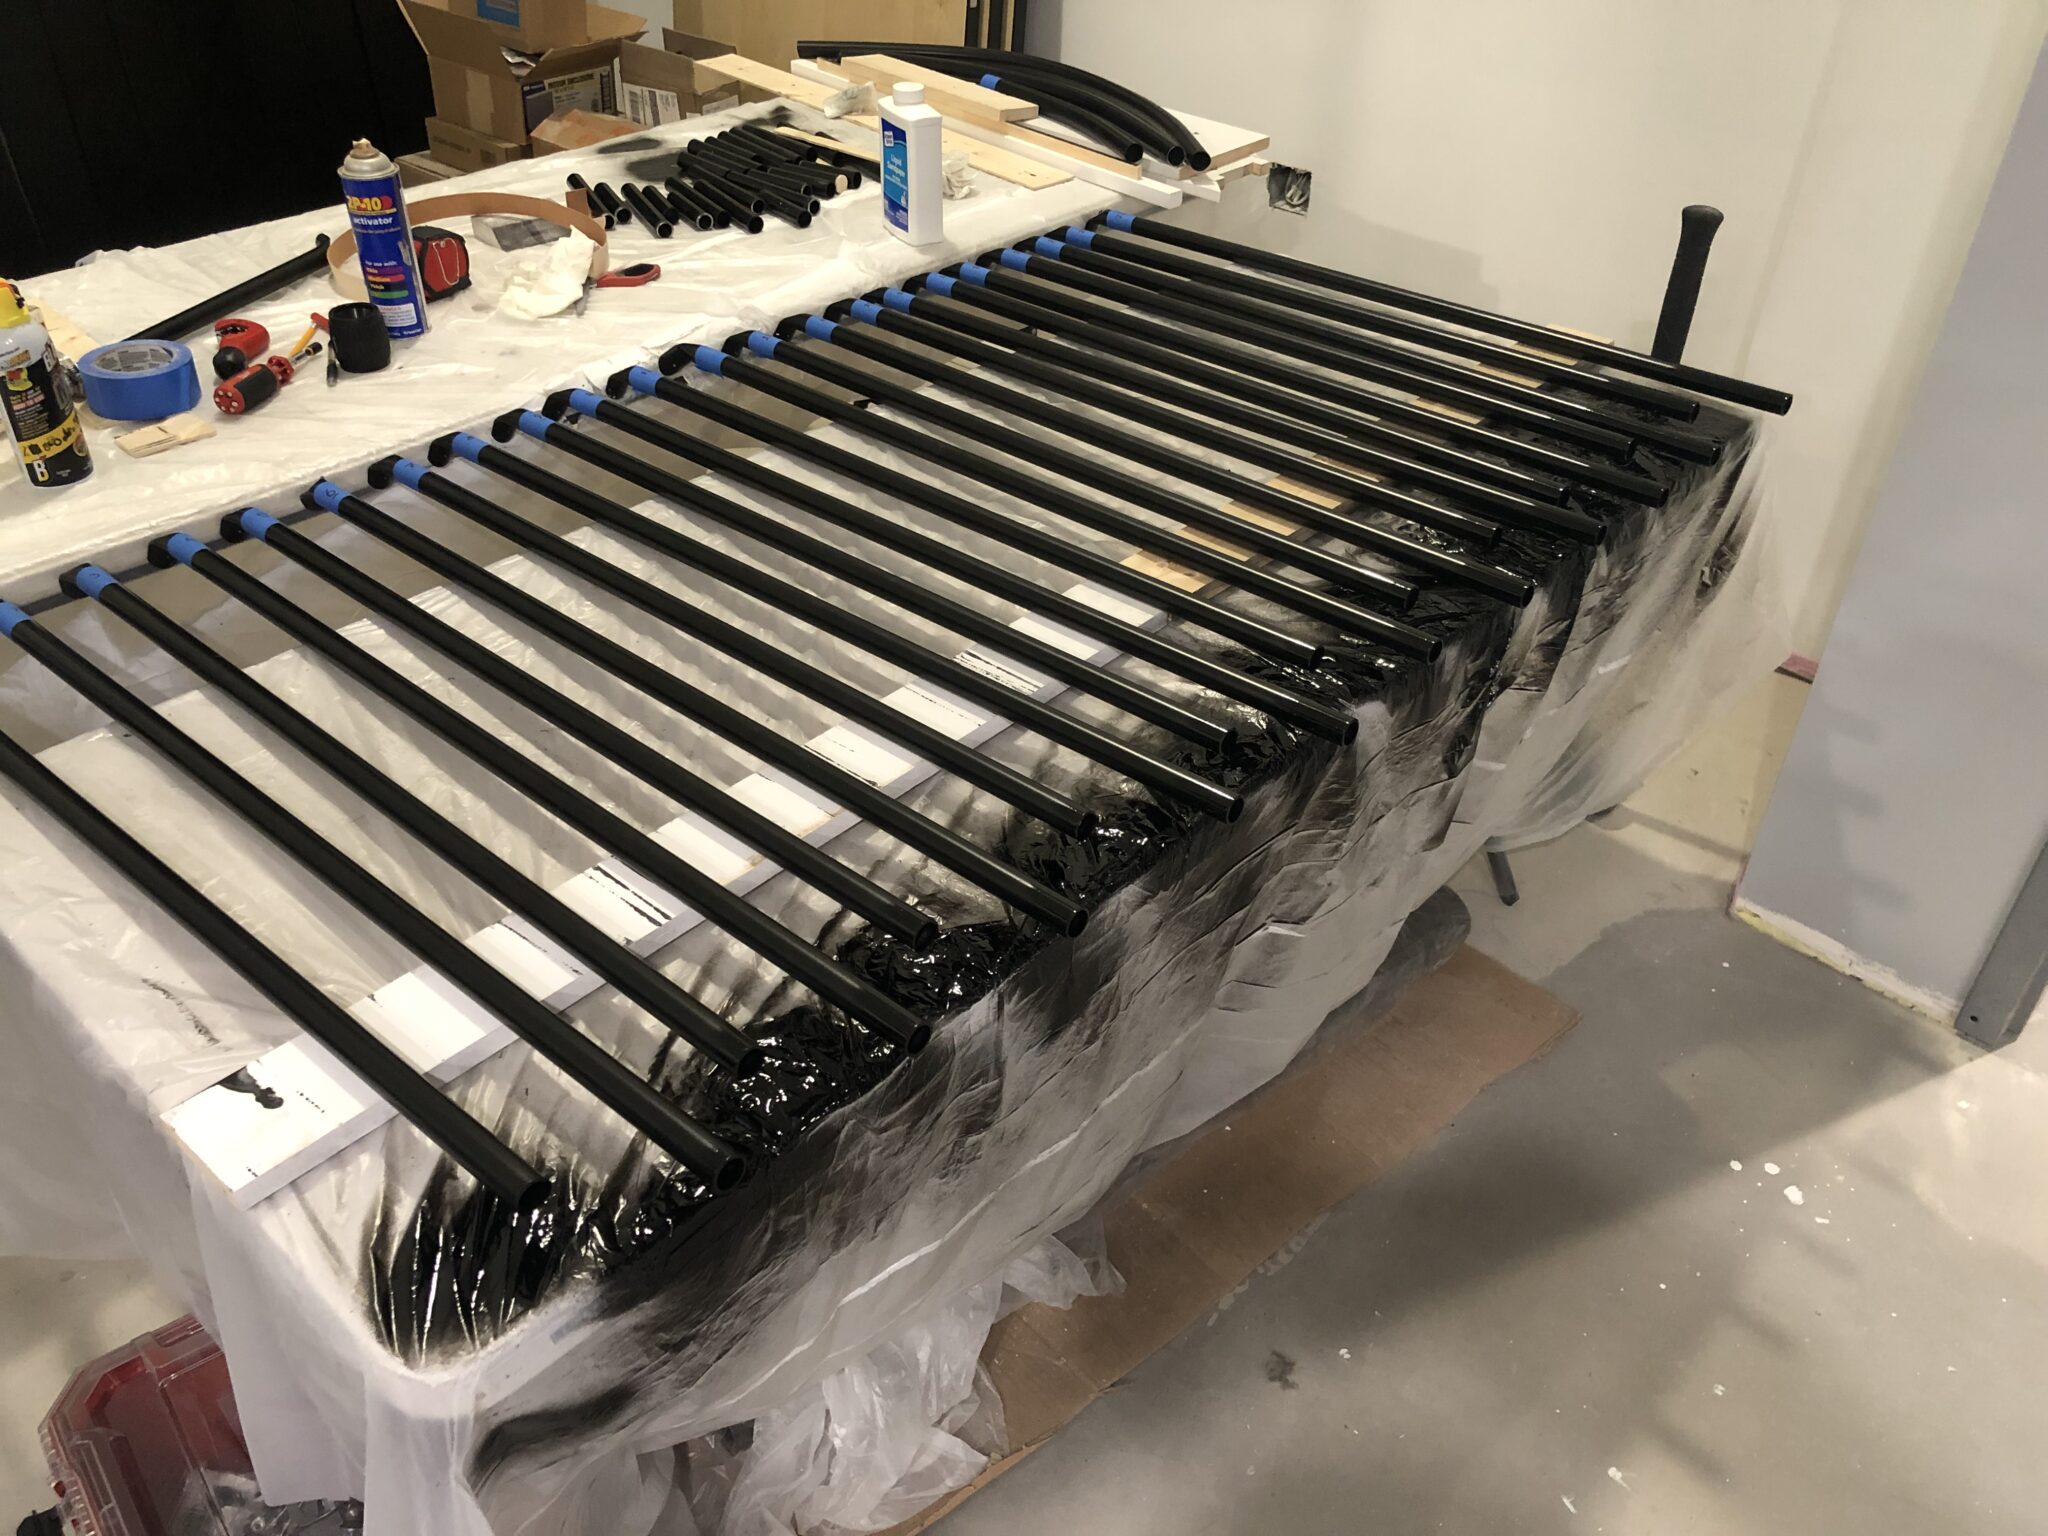
Each baluster is attached to the tread using a special nut that grips the inside of the tube, and attaches to the handrail with a self-drilling metal screw, just like the main balusters.
After attaching every baluster and tightening everything up, the stairs felt solid under foot and look great.
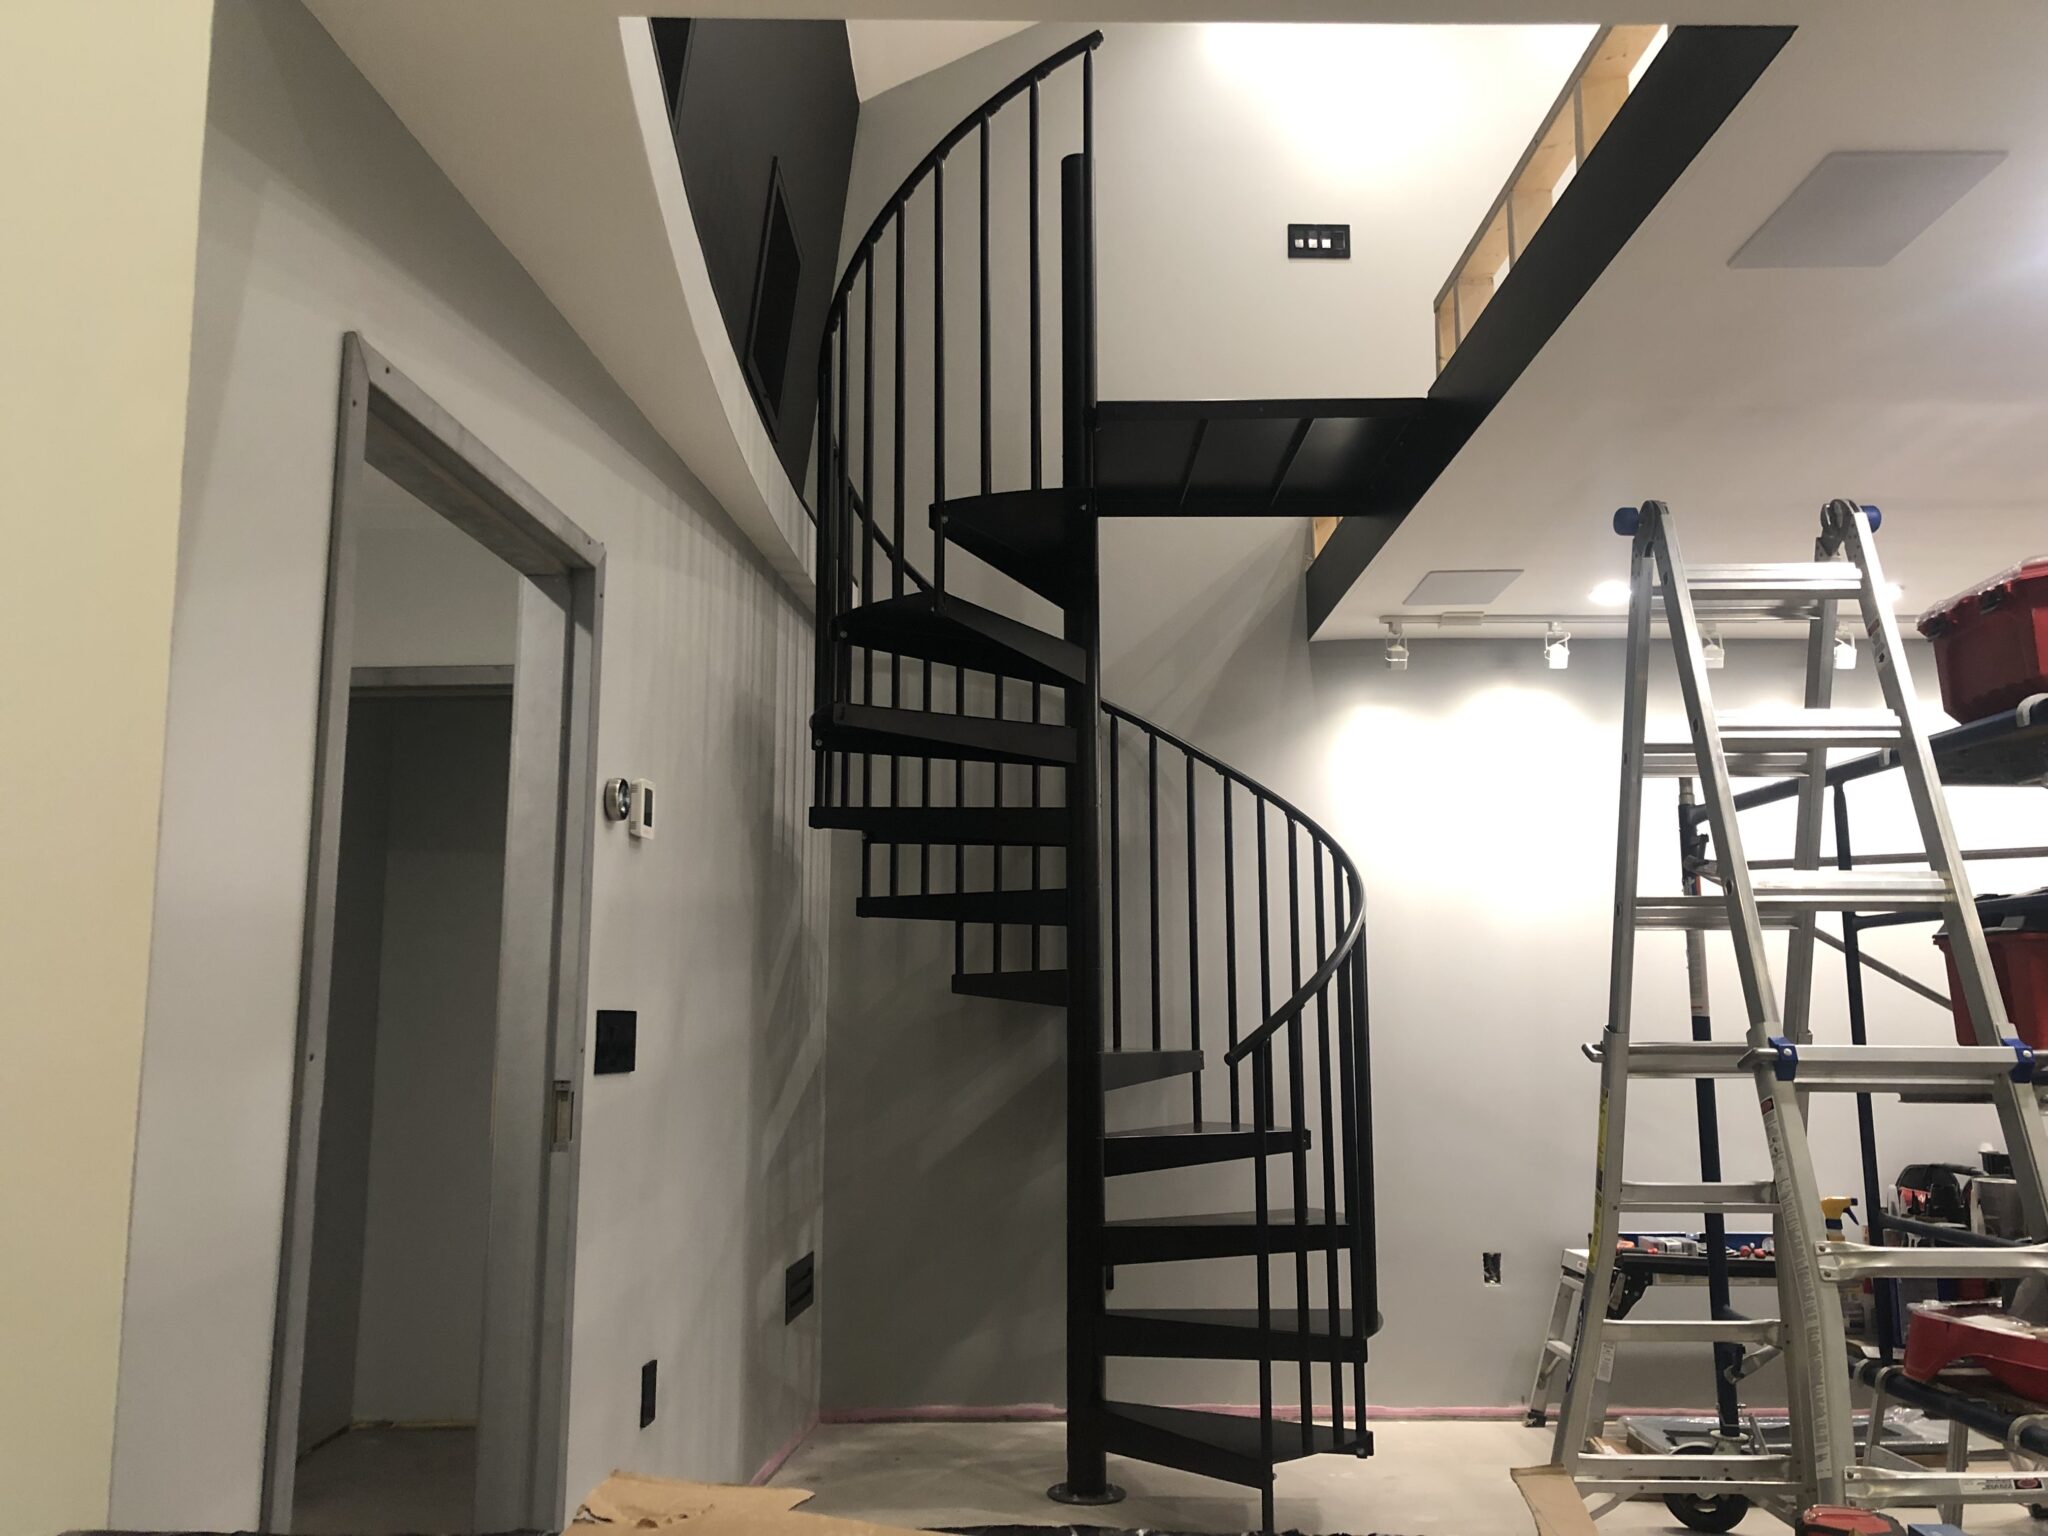
I’ll attach the railings for the landing after I’ve completed the trim work on the curb.
- Categories
- Construction