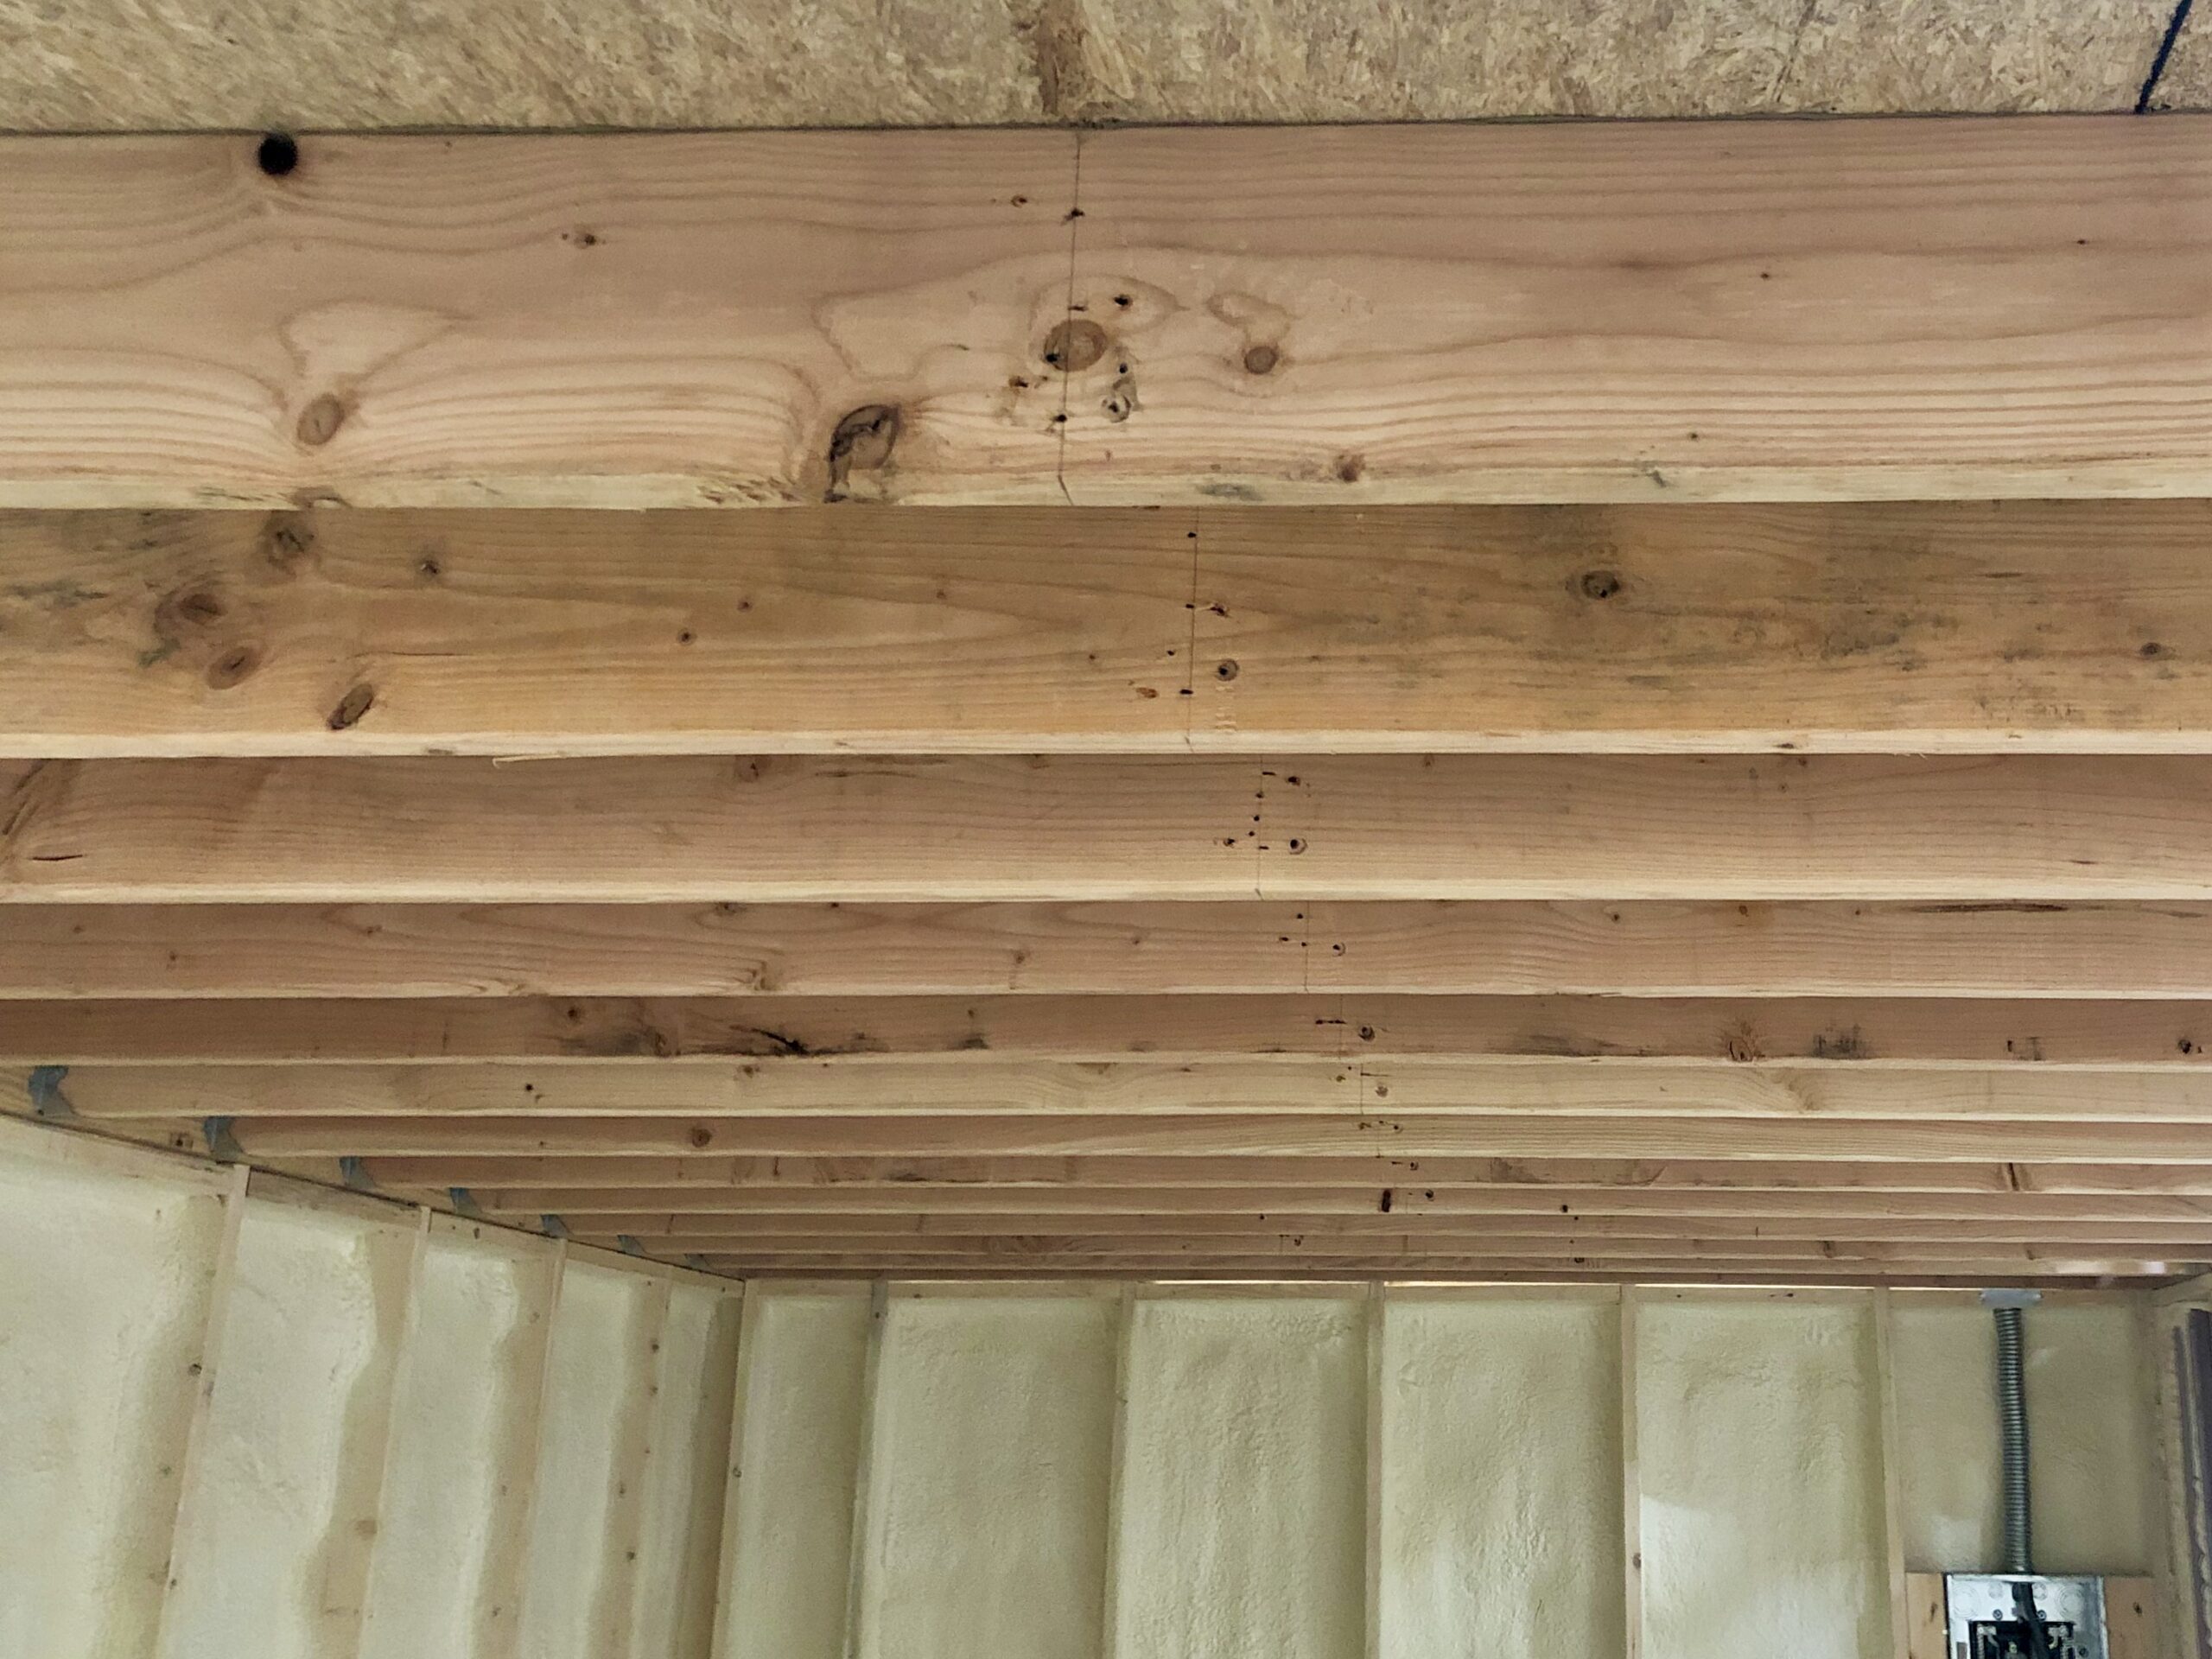
Today I finished replacing the floor joist bridging and attaching headers to the interior walls.
I had originally nailed in 2×8 blocking, but after the subfloor went on we found the blocks were very squeaky. I attempted to add structural screws to keep them from moving, but it did not help.
The other day I ripped out all the wood blocking between the floor joists.
Simpson NCA2X8-16 nailless metal bridging is installed by tapping in the top side about an inch from the top and then seating the spikes on the bottom side to secure it.
Then today I added nailless floor joist bridging.
This type of bridging can be attached before or after the subfloor and it leaves lots of space for electrical wiring to pass through.
The bridging was easy to install, but most importantly when I walked on the floor above it was completely silent.
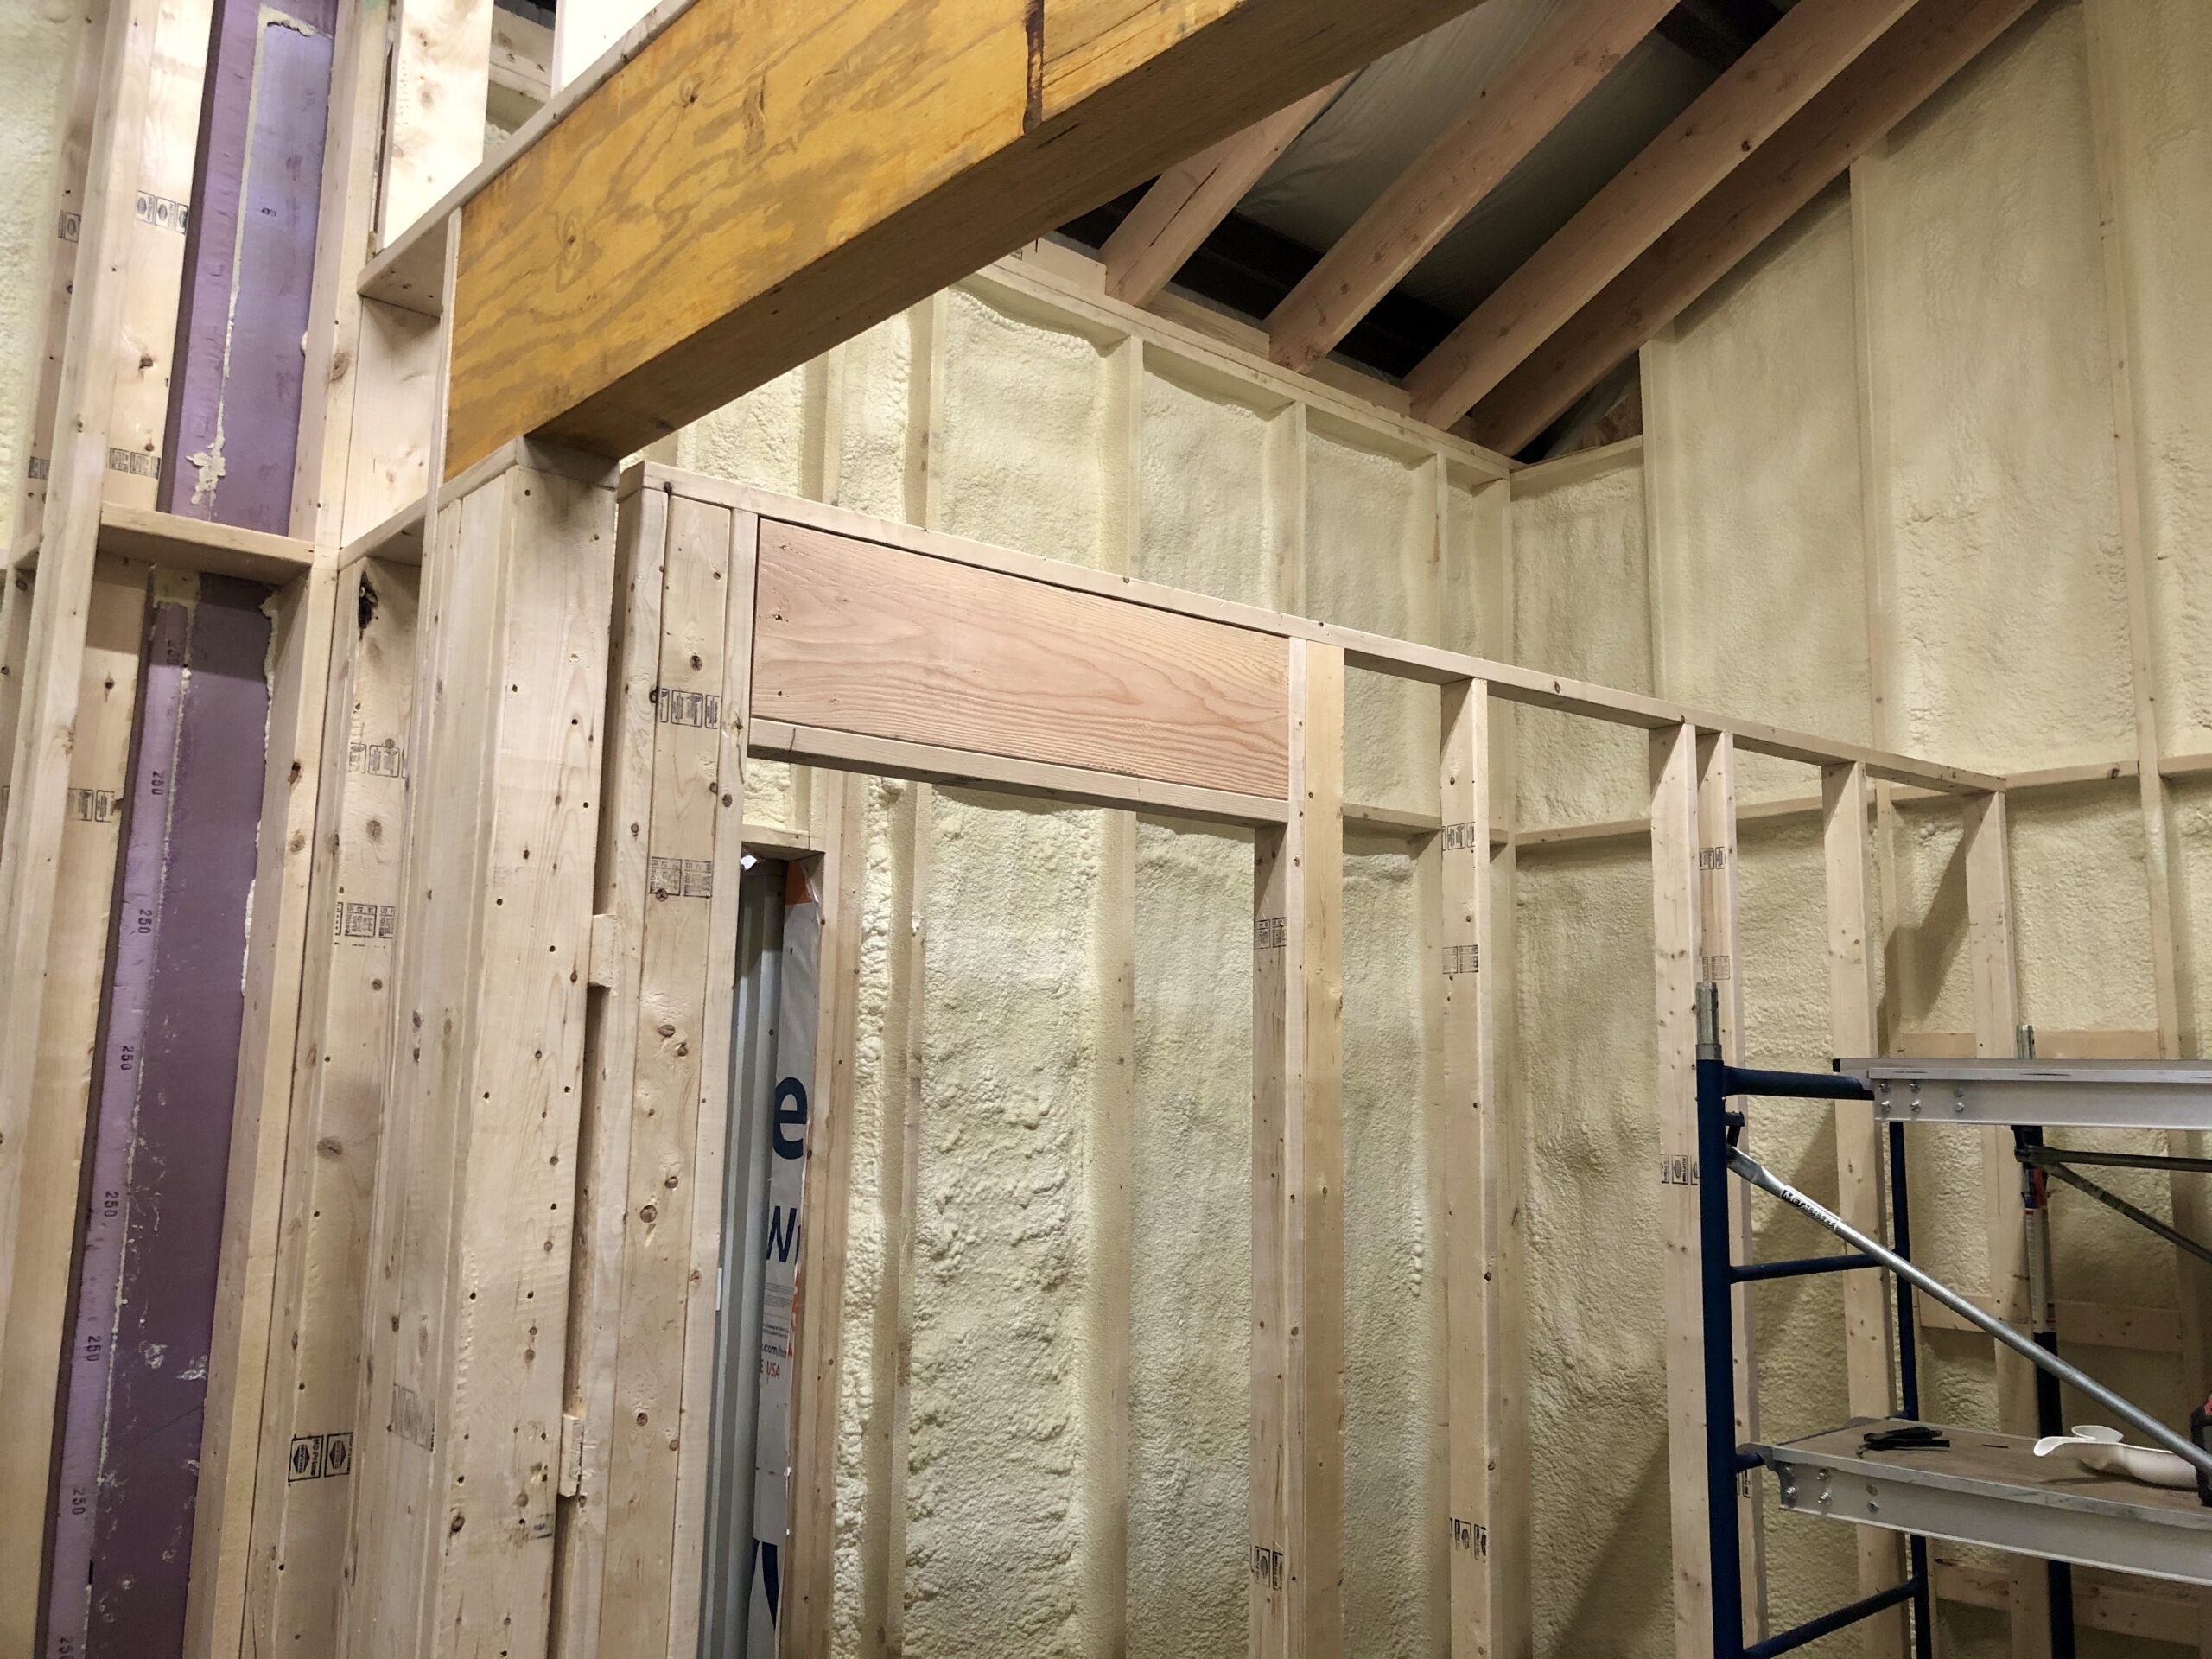
This 2×12 header is overkill, as the wall is bearing no weight.
I then added the headers to the interior walls.
This wall will have a floor and another wall above it, so I’ll be adding some steel brackets to make up for not using jack studs here.
It would have been easier to put these in when I was framing the wall.