Overhead Anchors
April 13, 2022
Over the winter I’ve been mostly focused on home remodeling, but I have also been chipping away at getting the ceiling anchor system in place.
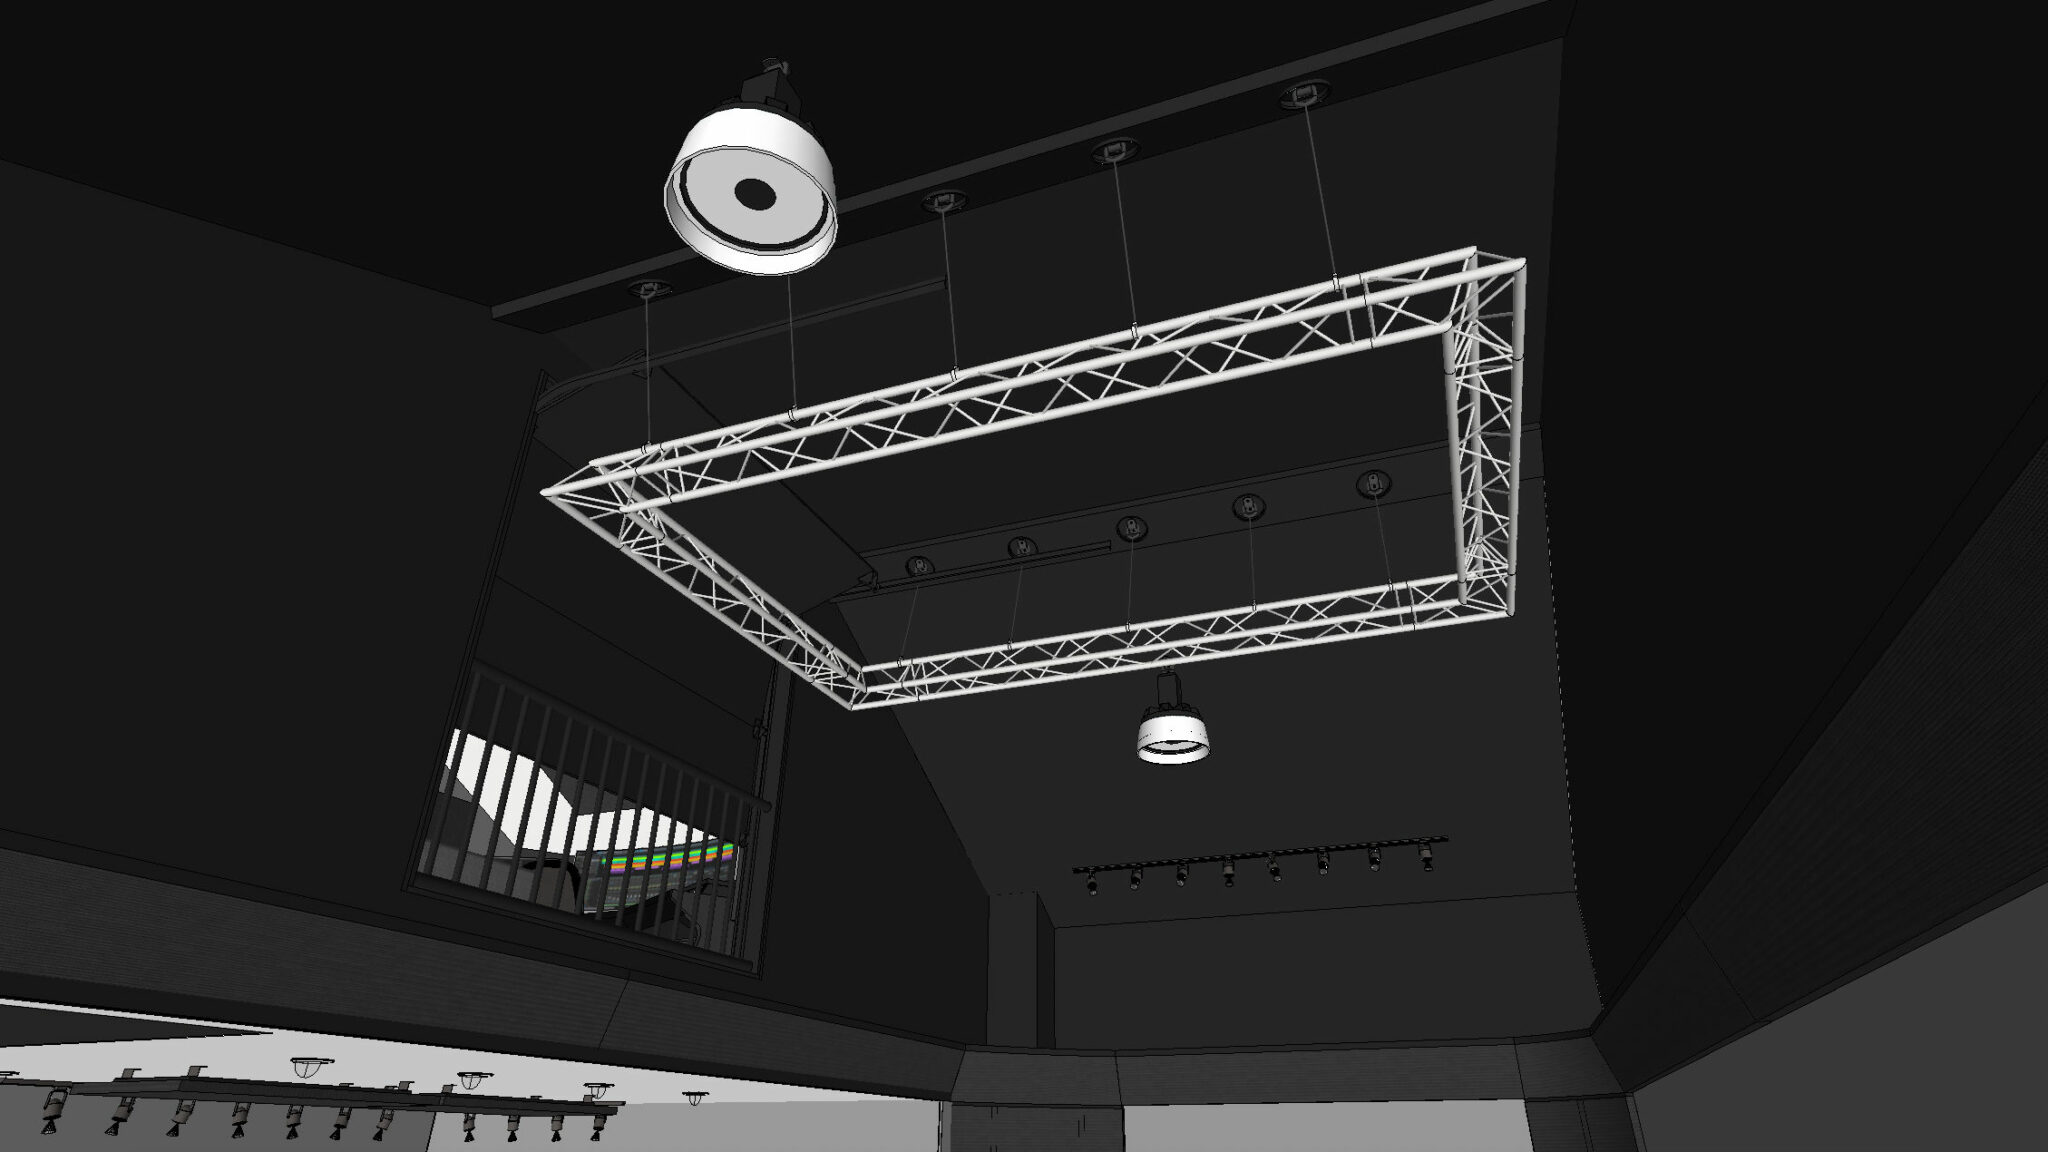
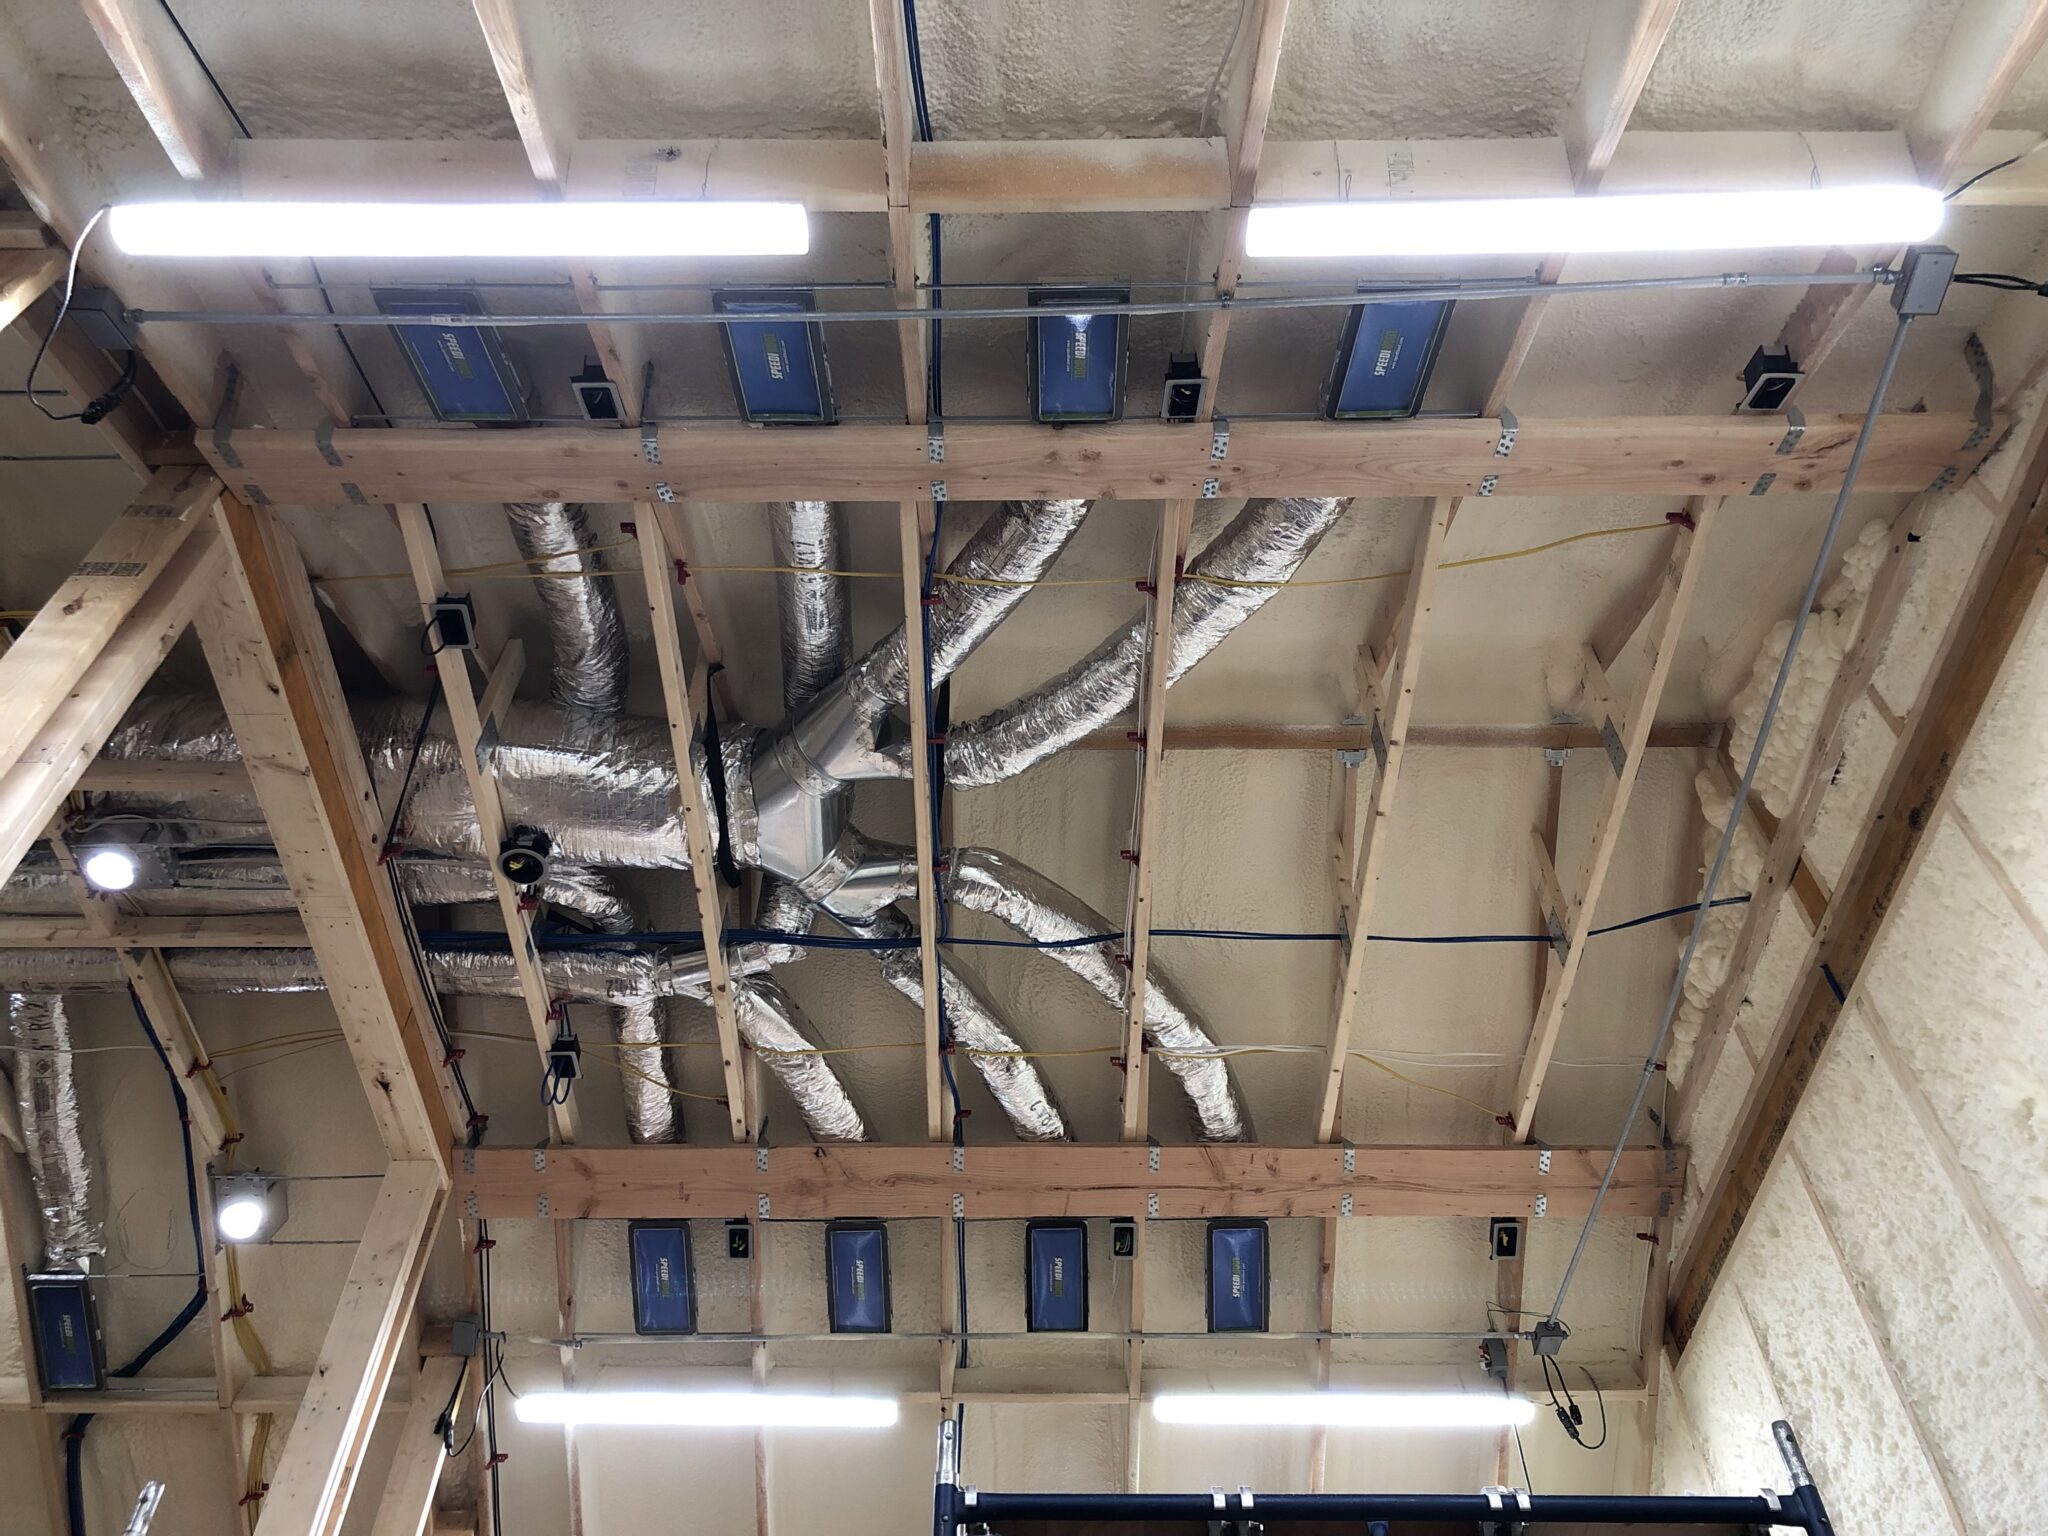
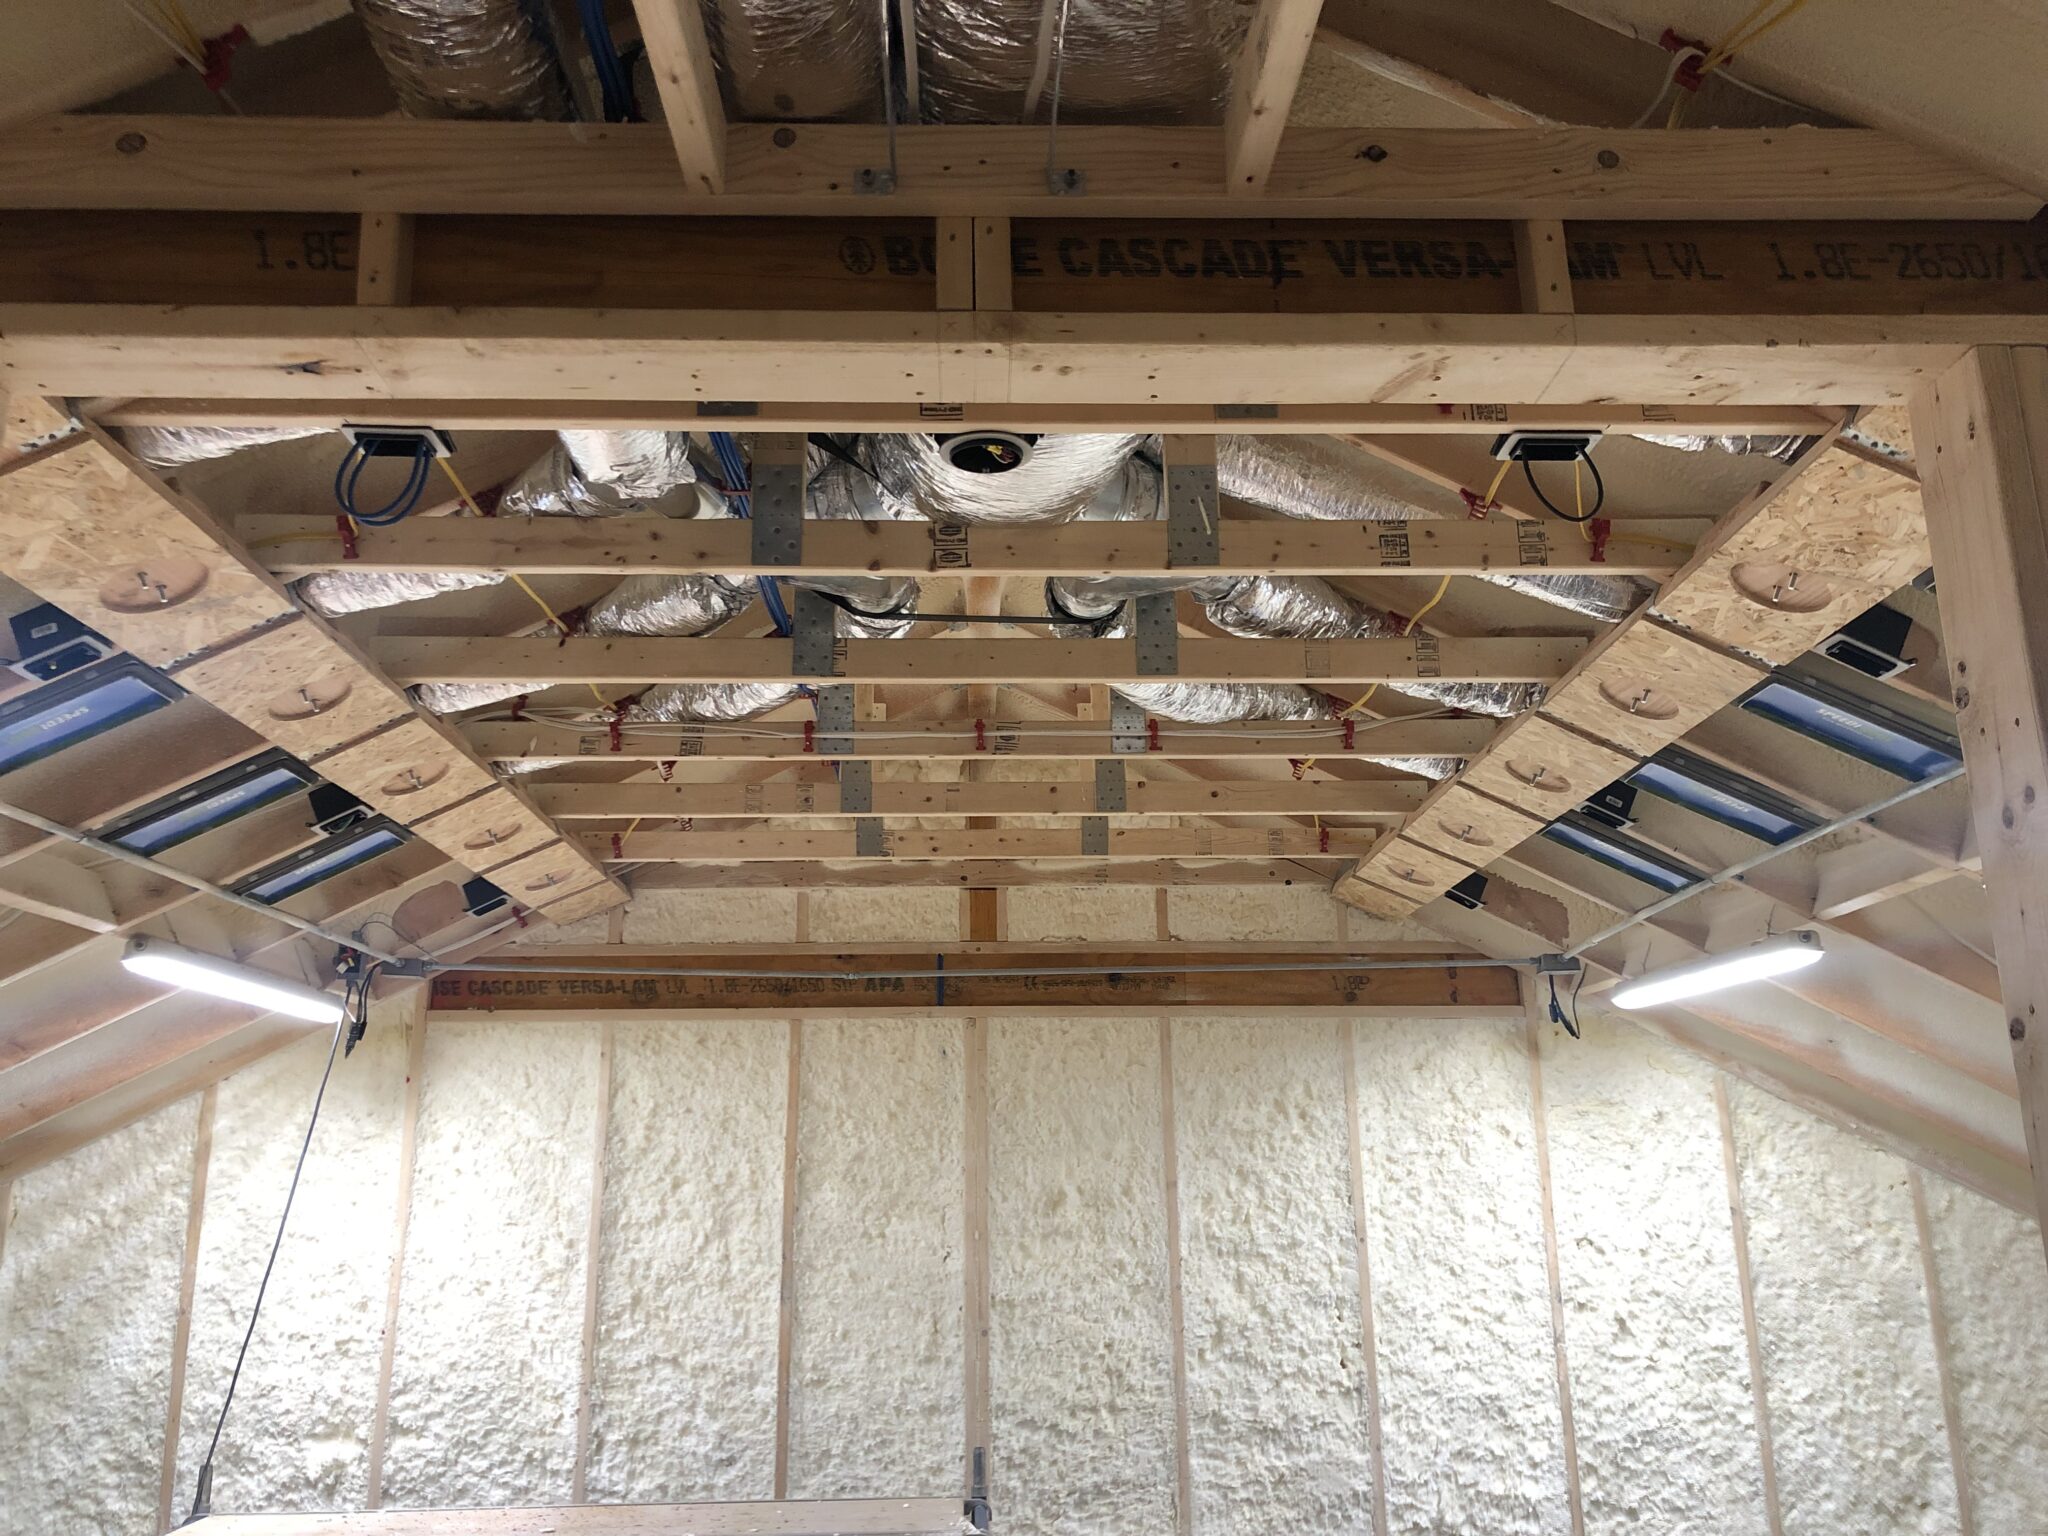
The goal is to be able to safely suspend a triangular truss system from the ceiling to attach lights and fly speakers.
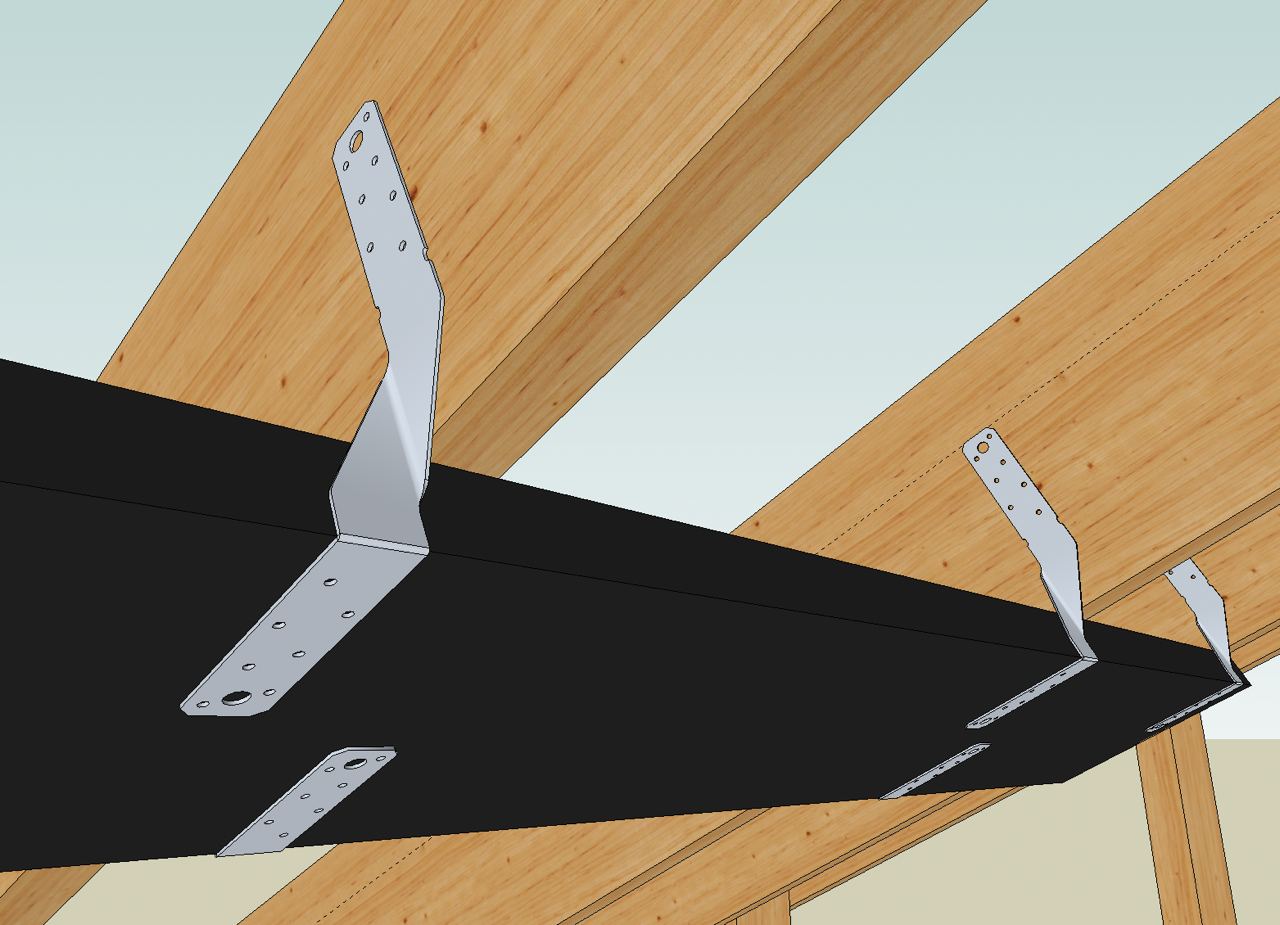
I went with a low profile design that distributes the weight as evenly as possible along all the rafters.
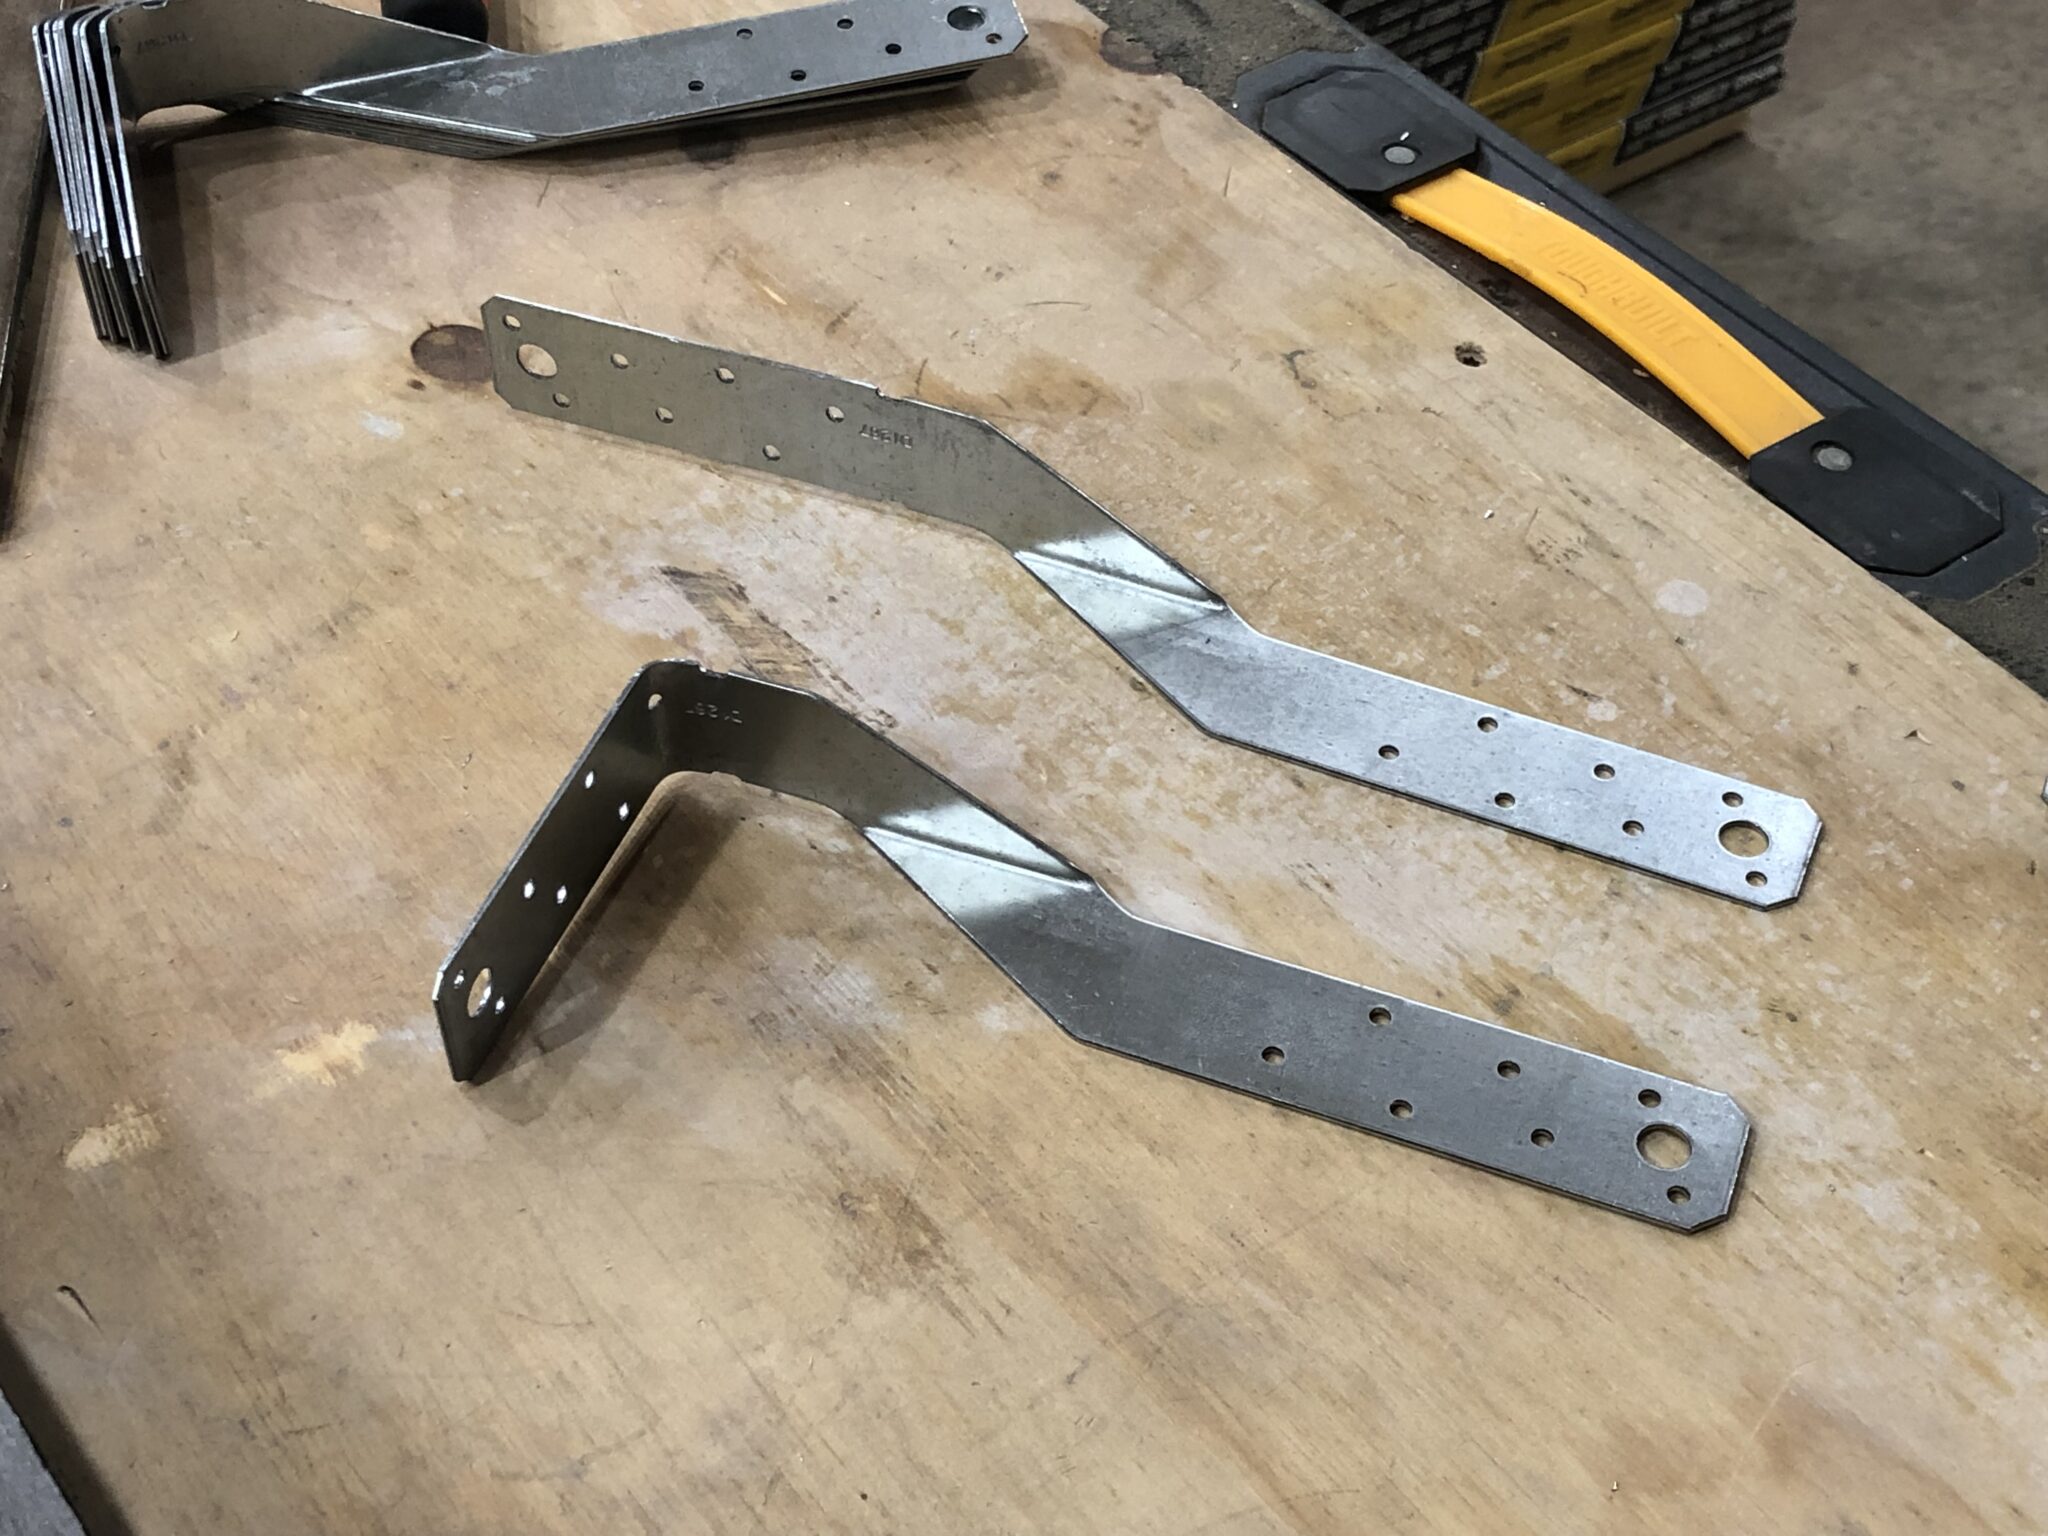
I used heavy-duty metal straps, using a metal break to uniformly bend them at the right point.
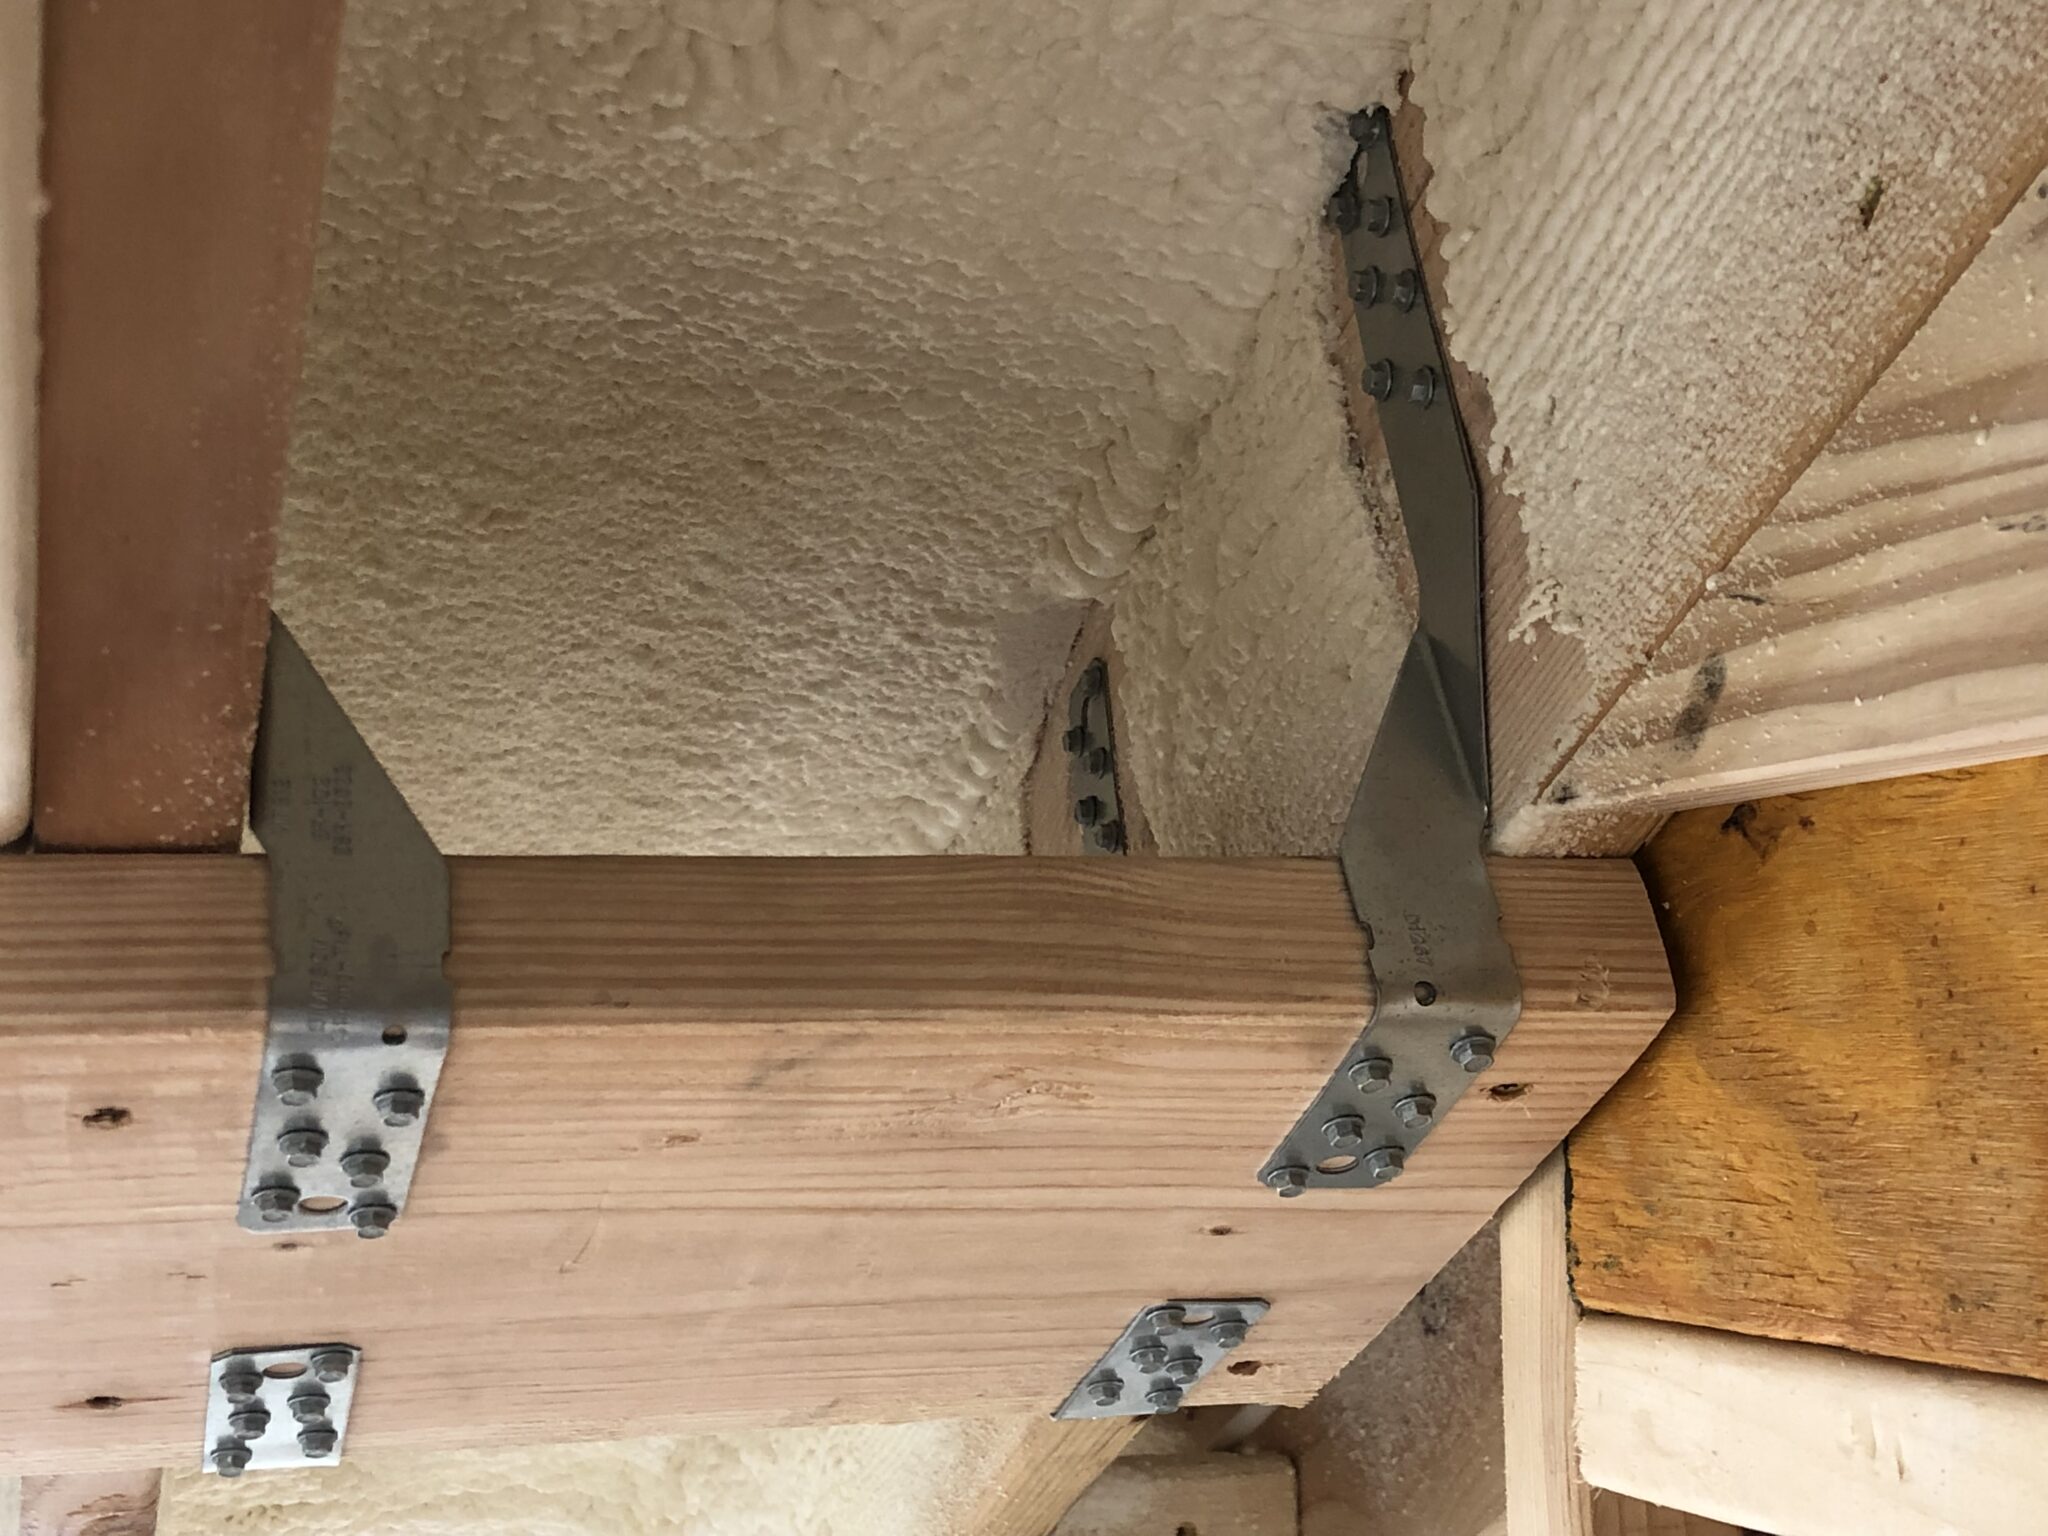
Improving on the original mocked-up design, I was able to install them so the straps aligned with each other.
The assembly will be drywalled over, and have the appearance of an exposed beam.
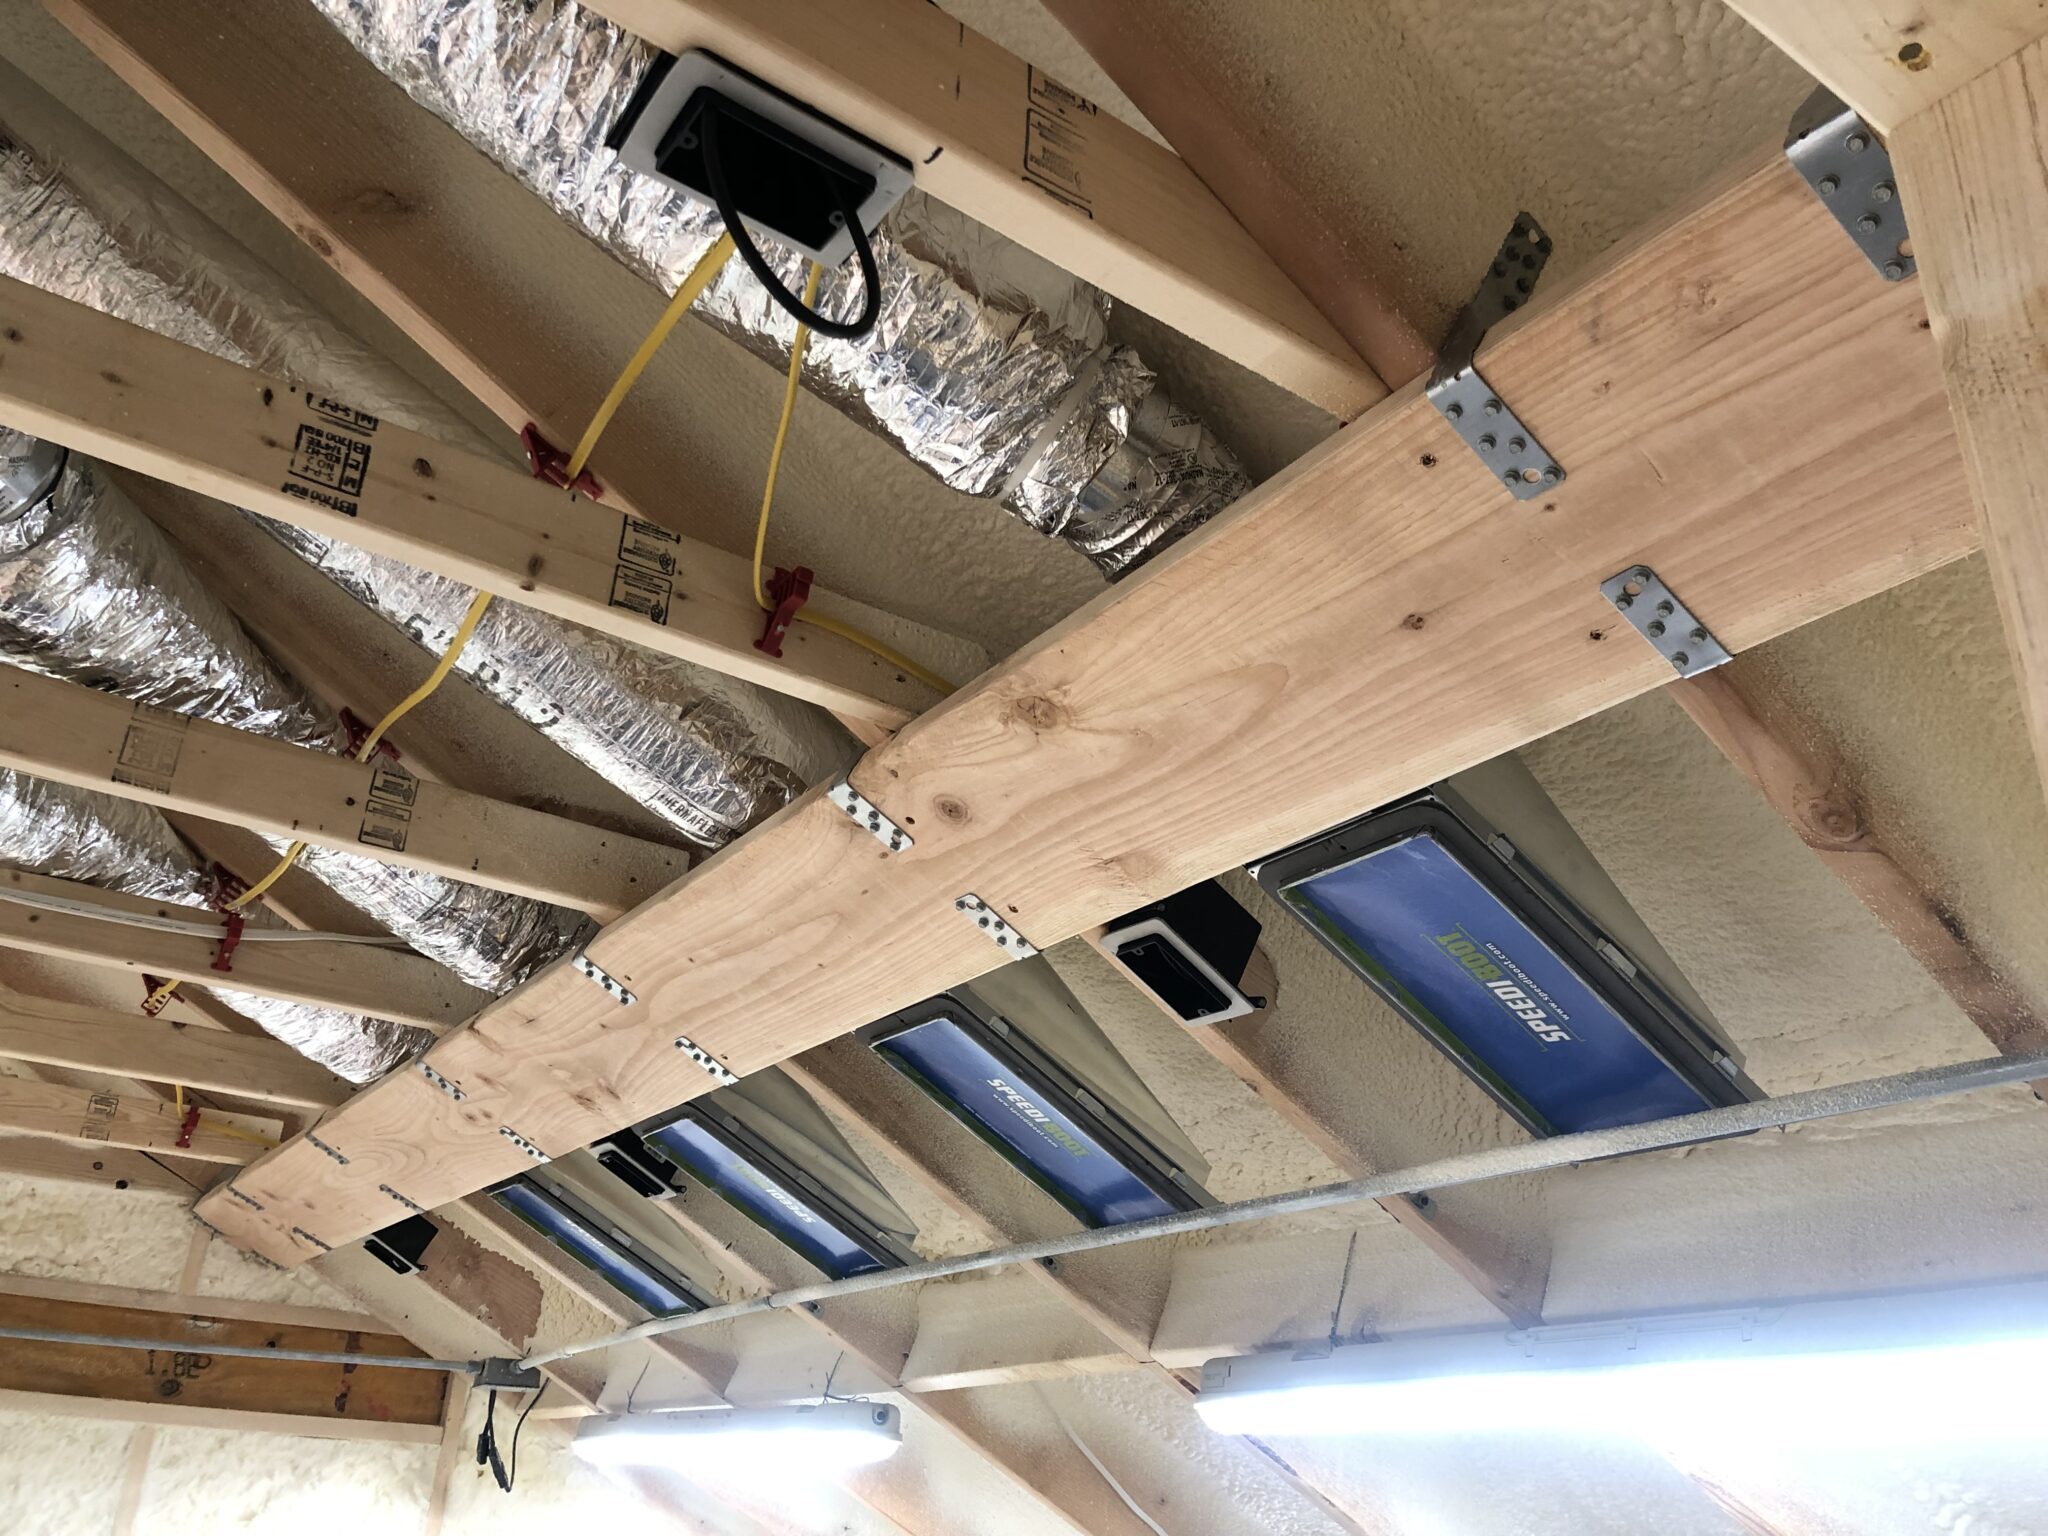
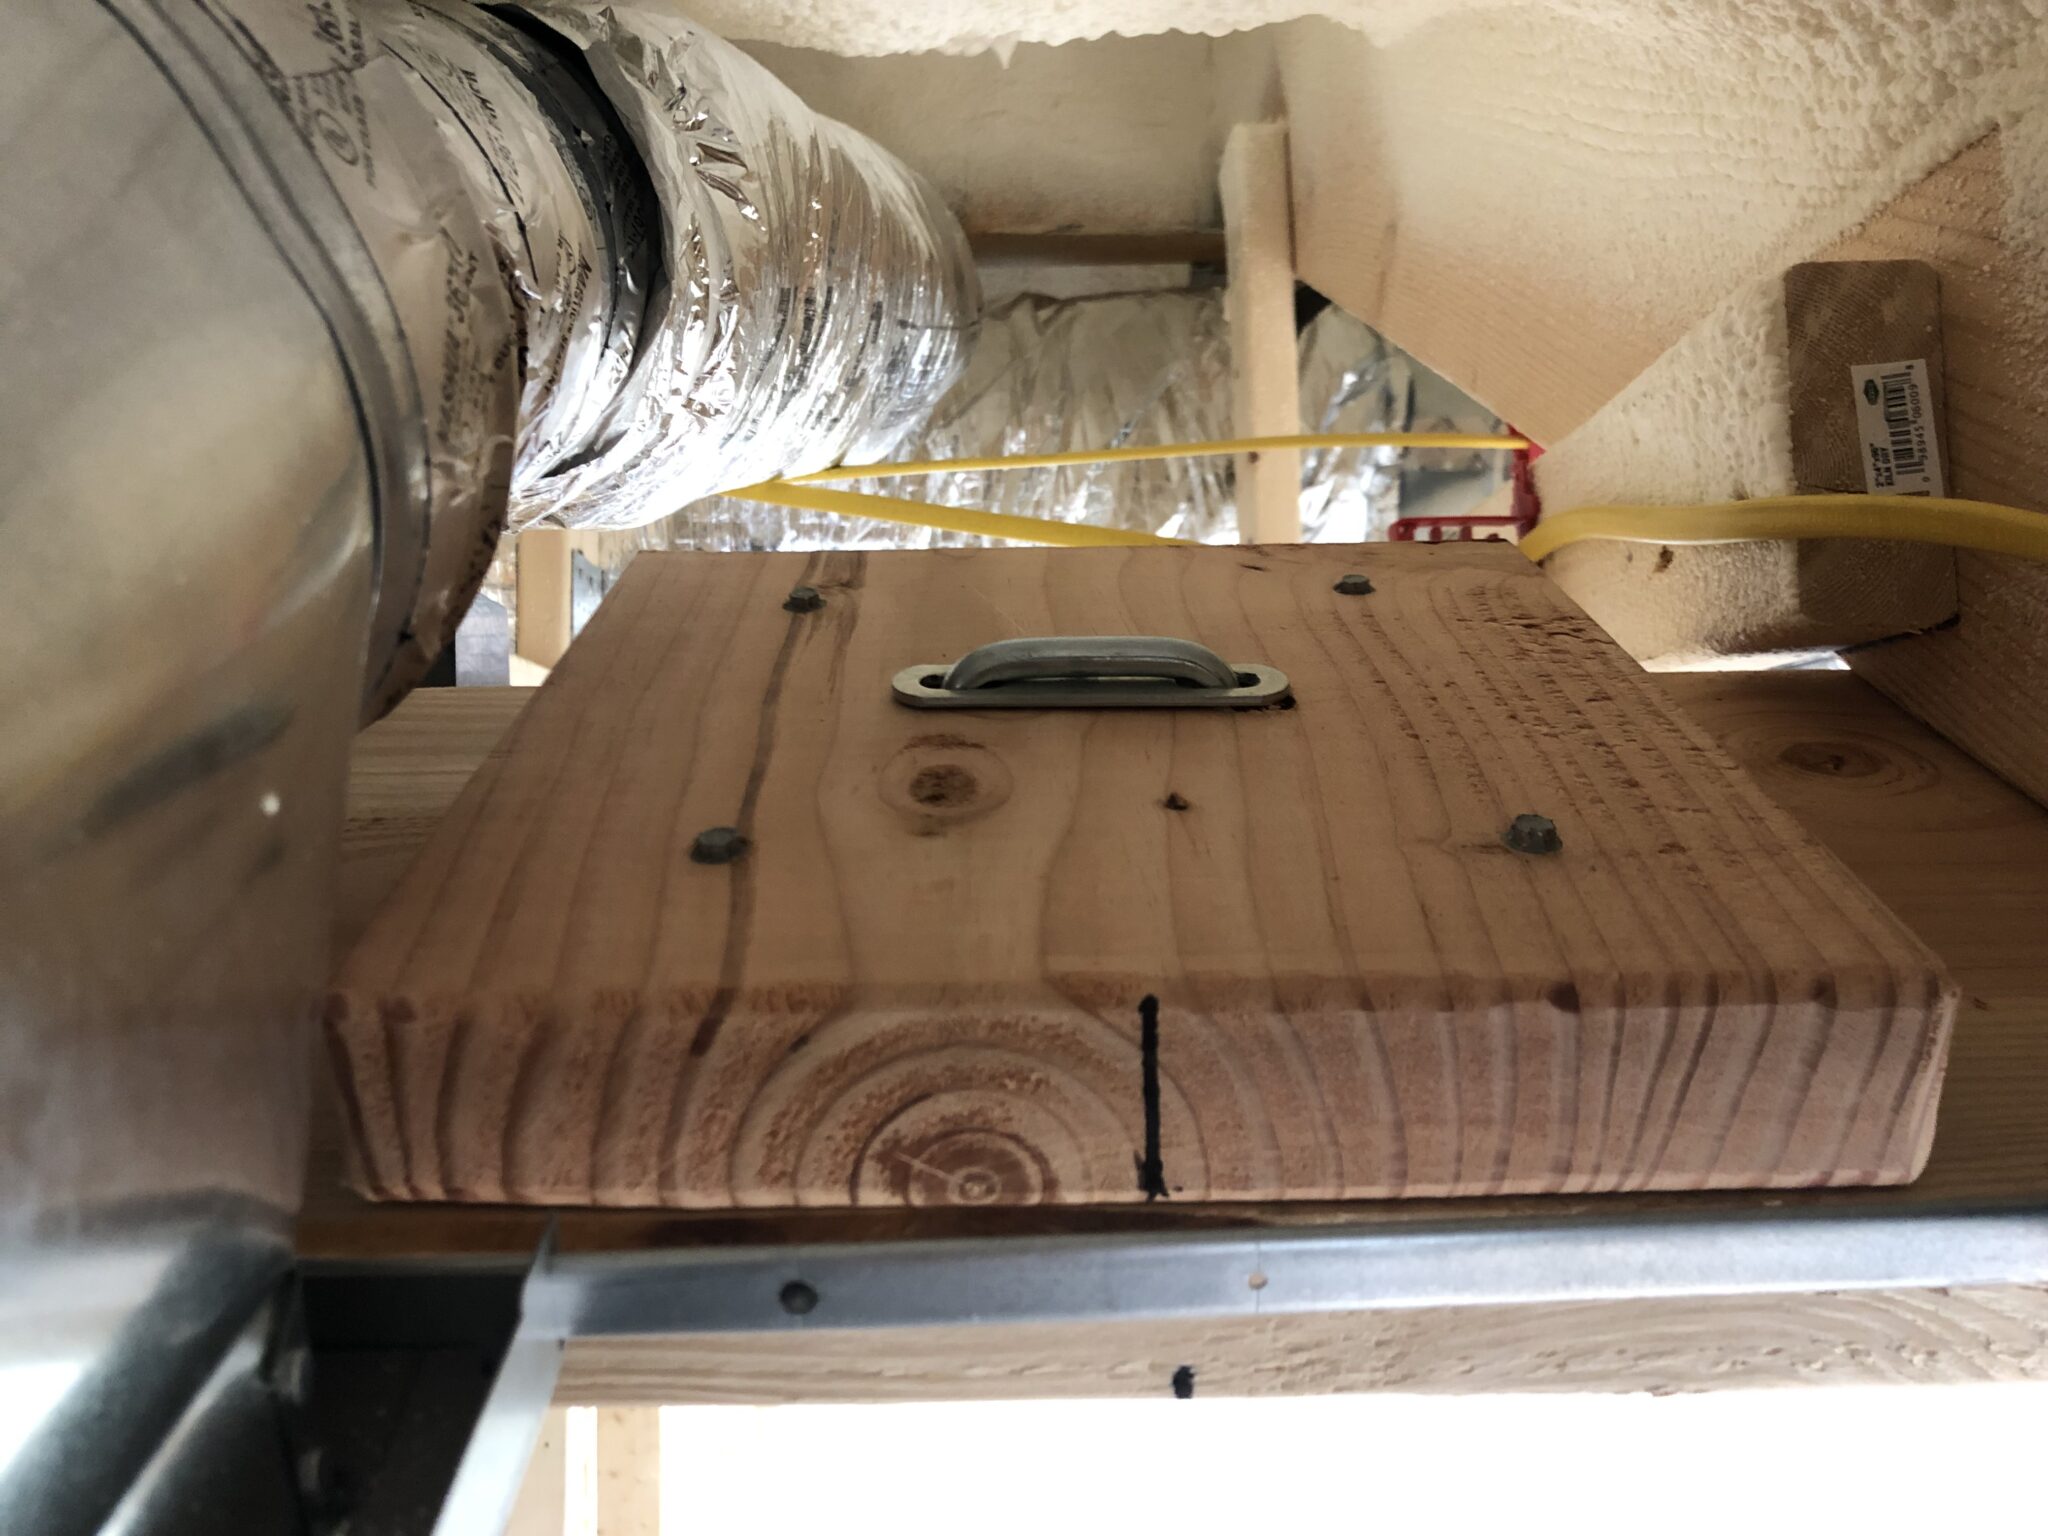
I plan to have the boards drywalled over, so I’ll be adding some OSB strips so the drywall sits away from the straps and screws.
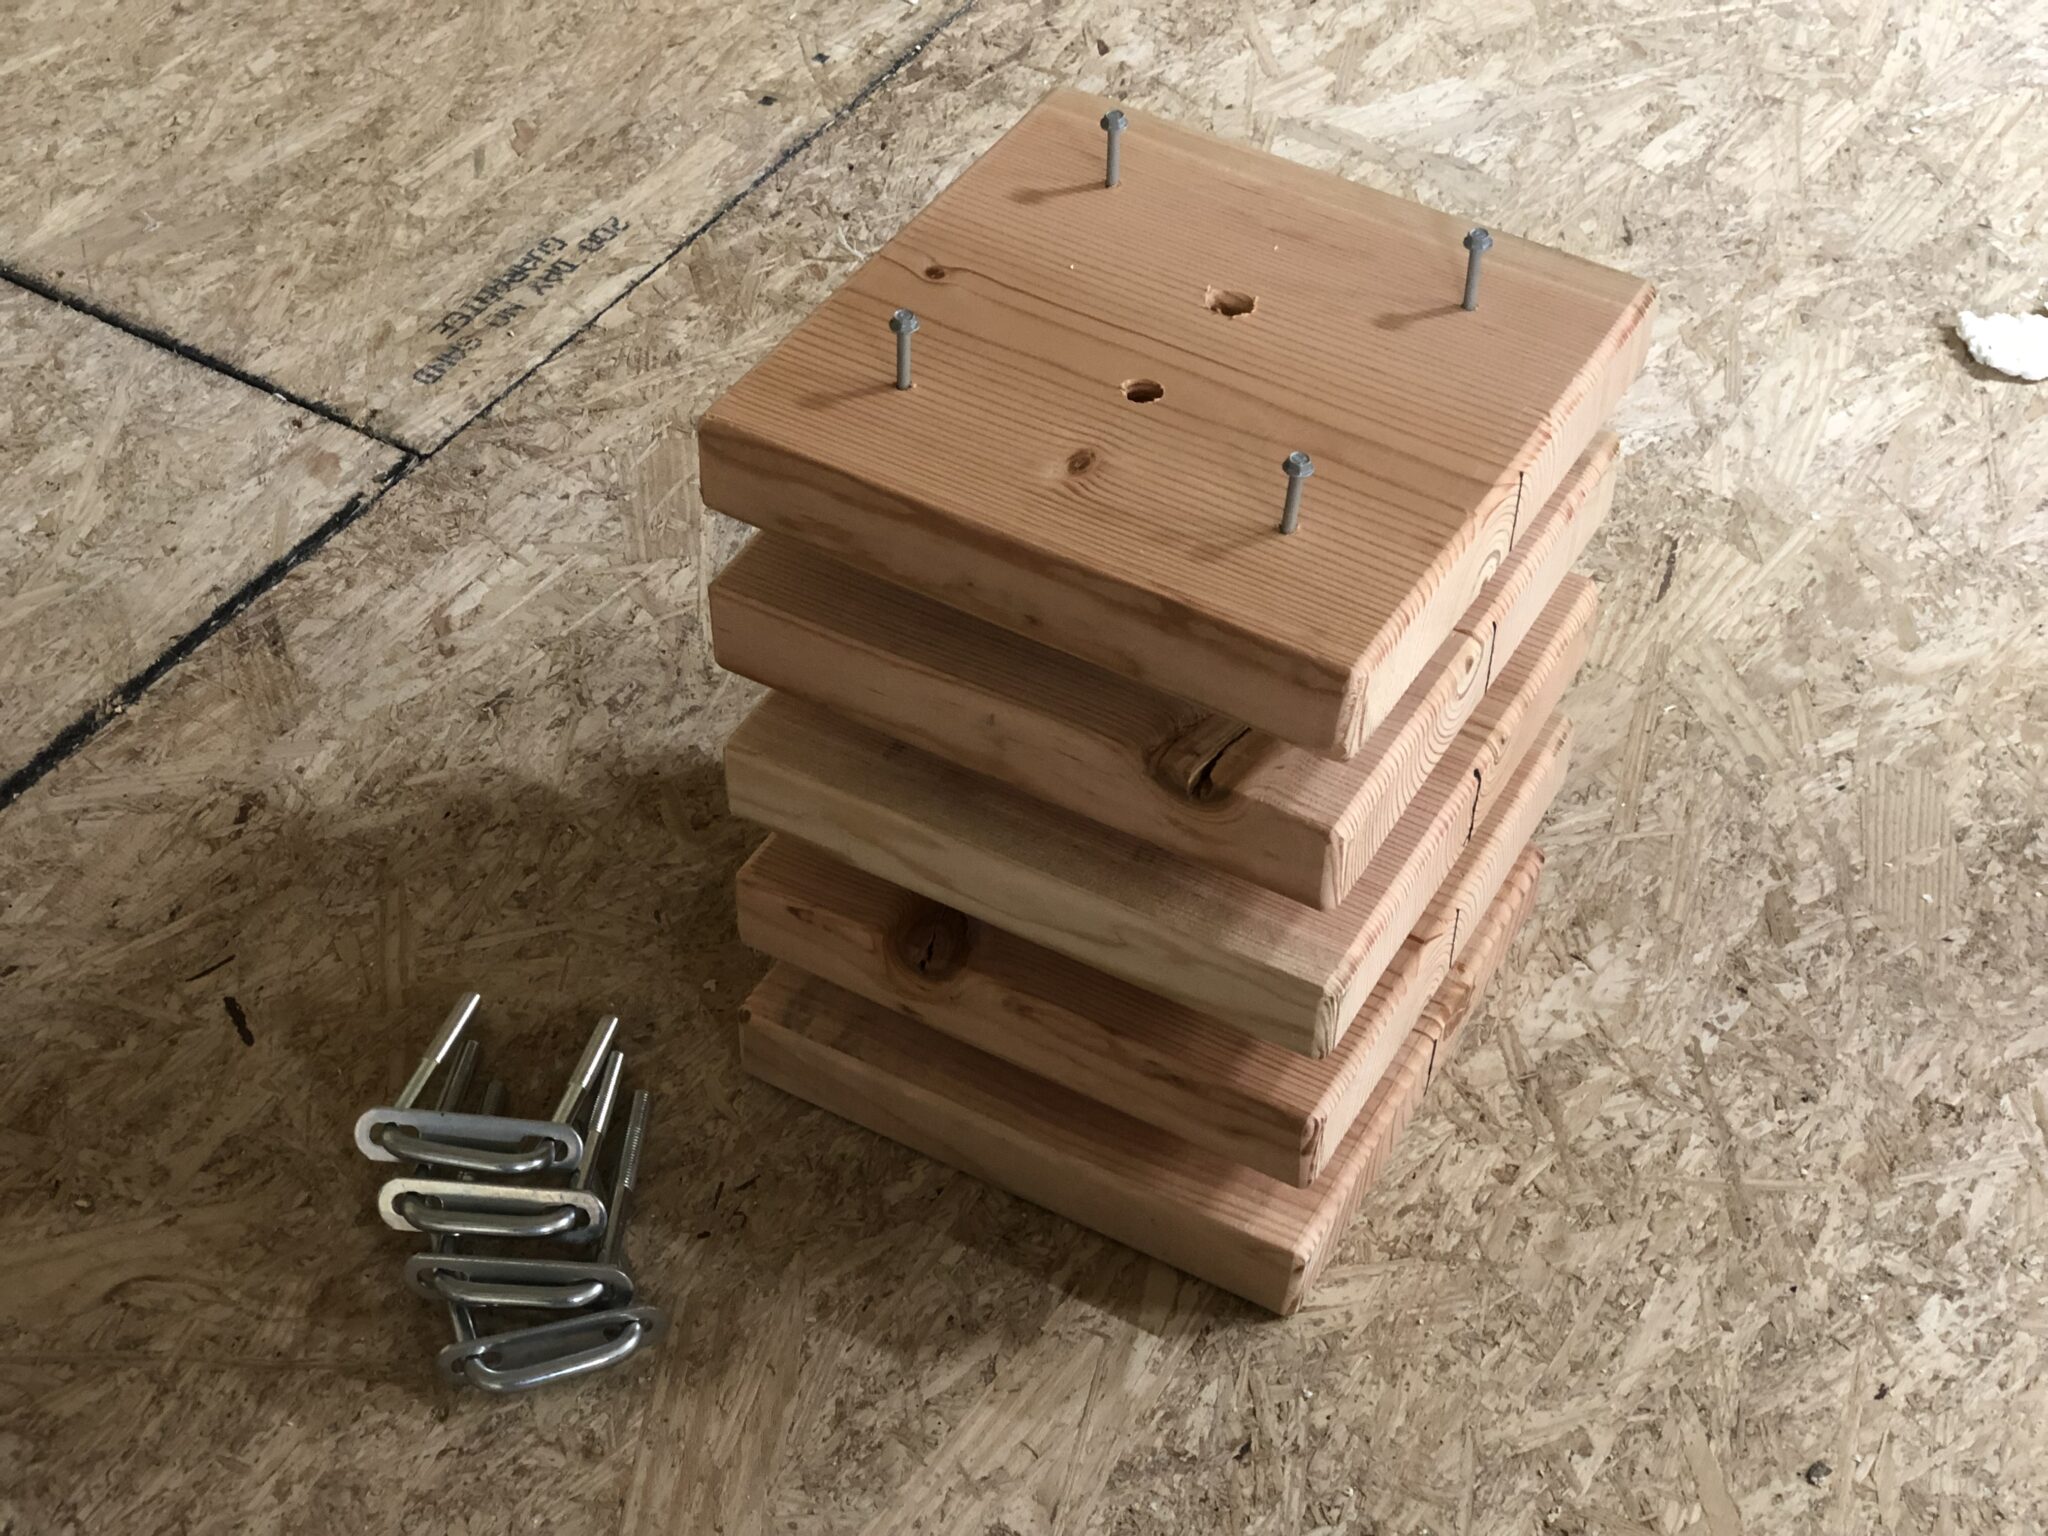
I cut and pre-drilled backing blocks that will provide additional strength due to their grain running the opposite direction as the board they’ll be attached to.
I used screws to hold the blocks in place, opting for hex-heads as they are easier to drive in tight spaces.

The anchors are evenly spaced 2 feet apart, 5 per side, centered within the room.
I then added some sheathing to add clearance for the straps and screws. After the drywall goes on, the 6 inch circles will be finished off with some round flanges.
- Categories
- Construction